If you have an infrastructure, whether large or small, it is extremely important to have a monitoring system that can raise alarms when something goes wrong.
zabbix today can be considered one of the best tools for this activity.
Today we will explain how you can install this tool.
To start with, you need an OS. Linux OS is required to install this, in our scenario we are using Debian 10.
-Obs. When creating the database we must be aware that MYSQL is no longer used, but MARIADB.
-Link with Zabbix repertoire for installation: https://www.zabbix.com/br/download
Step 01 – Choose your platform
- We must choose the Zabbix version that we will use, in this case we use 5.0 LTS.
- Soon after, you must choose the OS Distribution and Version, in this case we use Debian, version 10.
- Finally, we will choose the Database and Web Server, which in this case was chosen MySQL as the Database and for Web Server, Apache.
Step 02 – Install and configure the Zabbix server for your platform
a. Install the Zabbix repository
# wget https://repo.zabbix.com/zabbix/5.0/debian/pool/main/z/zabbix- release/zabbix-release_5.0-1+buster_all.deb
# dpkg -i zabbix-release_5.0-1+buster_all.deb
# apt update
b. Install the Zabbix server, frontend and agent
# apt install zabbix-server-mysql zabbix-frontend-php zabbix-apache- conf zabbix-agent
c. Create initial database
Perform the following steps on your database host.
# mysql -uroot -p
password
mysql> create database zabbix character set utf8 collate utf8_bin;
mysql> create user zabbix@localhost identified by ‘password’;
mysql> grant all privileges on zabbix.* to zabbix@localhost;
mysql> quit;
On the Zabbix server, import the initial schema and data. You will be prompted to enter the password you created earlier.
# zcat /usr/share/doc/zabbix-server-mysql*/create.sql.gz | mysql -uzabbix -p zabbix
d. Configure the database for the Zabbix server
Edit /etc/zabbix/zabbix_server.conf
DBPassword=password
e. Configure PHP for the Zabbix frontend
Edit /etc/zabbix/apache.conf, uncomment and set the correct time zone.
# php_value date.timezone Europe/Riga
f. Start the Zabbix server and agent processes
Start the Zabbix server and agent processes and configure them to start during system boot.
# systemctl restart zabbix-server zabbix-agent apache2
# systemctl enable zabbix-server zabbix-agent apache2
g. Configure the Zabbix frontend
Connect to the installed Zabbix frontend: http://server_ip_or_name/zabbix
Step 03 – Installing the frontend
Step 1:
In your browser, open the URL for the server hosting the Zabbix web interface: http://
You should now see the first screen of the web interface configuration wizard.

Step 2:
Make sure that all prerequisites are met.
Optional prerequisites may be present in the list. An optional prerequisite will be shown in orange and have the status of Alert. Failure of this type of parameter does not block the setup wizard.

Step 3:
Enter the connection details to the Zabbix database. The bank should have already been created.

Step 4:
Enter the Zabbix Server data.

Step 5:
Review of settings.

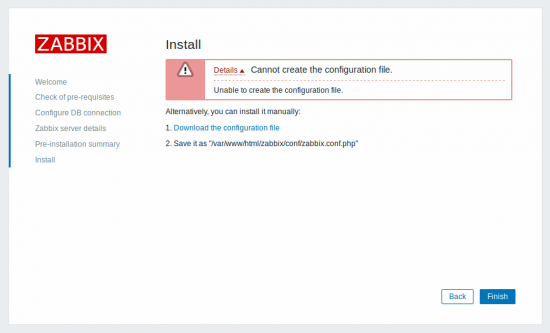
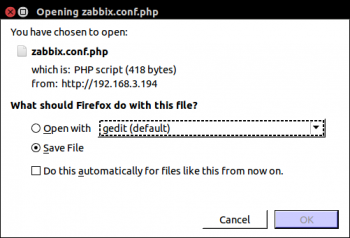
Step 6:
Download the generated configuration file and install it into the conf/ directory that exists where you copied your Zabbix PHP files to.
Step 7:
Finish the installation.

Step 8:
The Zabbix web interface is ready for use! The default user and password are: Admin / zabbix.

We hope you have managed to install it. If you have any problems or questions, please contact us.