Recently, VMware ‘s new owner made a statement that echoed throughout the community: there will be no more free VMware licenses, and the cost of new licenses has increased by 40%. This drastic change in licensing policies has led many IT professionals and companies to re-evaluate their virtualization strategies. As a result, alternative solutions are emerging, most notably Proxmox, the most widely used Open Source virtualizer in the world.
Proxmox offers a full range of features comparable to those offered by VMware, including functionalities such as clustering, replication, high availability (H.A.) and the guarantee of high availability, all without the high licensing costs associated with the VMware platform. With the ability to perform all these essential virtualization operations without compromising quality or reliability.
If you already use VMware and are considering migrating to Proxmox, we’ve put together a detailed article that demonstrates the process of migrating VMs directly from VMware to Proxmox. This practical guide offers step-by-step instructions to ensure a smooth and efficient transition, allowing you to take full advantage of the features and benefits of Proxmox in your virtualization environment.
ProxMox migration process
Export
The first step is to install ovftools using this link, after which you can send it via SCP to your ProxMox server using the command:
> scp ~/Downloads/VMware-ovftool-4.6.2-22220919-lin.x86_64.bundle root@172.16.102.2:~ 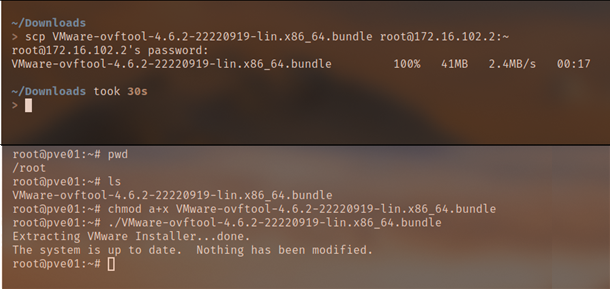
After that, on your Proxmox server, give the execution permission to the uploaded file and then run it:
root@pve01:~# chmod a+x VMware-ovftool-4.6.2-22220919-lin.x86_64.bundle
root@pve01:~# ./VMware-ovftool-4.6.2-22220919-lin.x86_64.bundle
That’s it, OVFtools is installed!
With this binary we will proceed to two steps, the export and the conversion, OVFTOOLS will connect remotely to your VMware ESXI server, and through the command line you will inform which VM you want to export, then ovftools will download this VM and then convert it to the Proxmox standard, to perform this step on the server where OVFTOOLS is installed run the command:
ovftool vi://root@{IP or FQDN of ESXi host}/{VM name} /path/to/export/location
After finishing Export, let’s import this VM using the command:
qm importovf {vmid} {VM name}.ovf {target storage}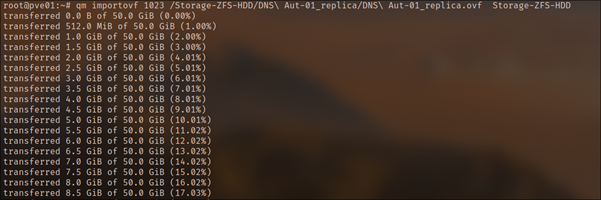
And after IMPORT is finished, the VM will already be configured in your ProxMox
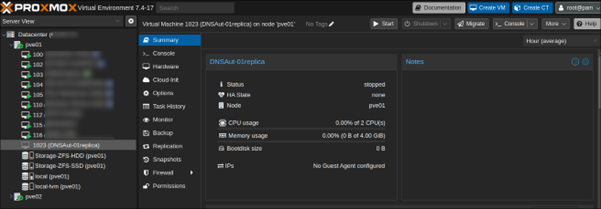
With just a few commands, we have already managed to migrate our first VM from VMware to Proxmox. All you have to do is repeat this procedure for the other VMs in your environment.
But that’s not all. ProxMox has several other interesting functions that you can use right from the start of your implementation, so stay tuned for future posts! You will learn to:
- Configure Backup
- Create Cluster
- H.A. configuration
Migrating from VMware to Proxmox can be a strategic choice to optimize your resources and reduce costs without compromising on quality. If you’re looking for a solid, cost-effective alternative to your virtualization needs, we’re here to help. Contact us to explore the possibilities and start the migration process to migration.