Hey guys, how are you? My name is Henrique, I’m a Made4IT consultant and I’m part of the infrastructure and servers team. Today we’re going to learn a little about Zabbix and I’m going to give you an overview of what Zabbix is, how the tool works and also teach you how to install and configure a Zabbix server.

For those who don’t know, Zabbix is a totally open source monitoring solution for companies of any size.
What does the Zabbix tool do?
→ Provides health monitoring of servers, networks, applications and services through parameters and metrics.
→ It also provides a flexible mechanism for sending customized notifications about detected alerts and events and we can send these notifications via email, Telegram, SMS and even opening a ticket in HelpDesk systems.
→ Reporting and data visualization based on stored data for analysis and decision making.
→ Supports polling and trapping
⇒ Polling: Zabbix sends requests through configured metrics
⇒ Trapping: Zabbix receives information from configured metrics
→ It has a graphical interface for viewing and configuring the monitoring (devices to be monitored → applications, servers and services)
→ Support provided by Zabbix SIA and also by official partners, where Made4IT recently became an official Zabbix partner.
Zabbix version 6.0 LTS
Recently, Zabbix was updated to version 6.0 LTS, which has several new features such as: Kubernets Monitoring, Business Service at a completely different level, High Availability Cluster (HA Cluster) native, Advanced Service SLA Calculation Logic , Machine Learning.
Follow the link for a deeper reading about the 6.0 LTS update: https://www.zabbix.com/br/whats_new_6_0#business_service_monitoring
Requirements for installing Zabbix 6.0 LTS
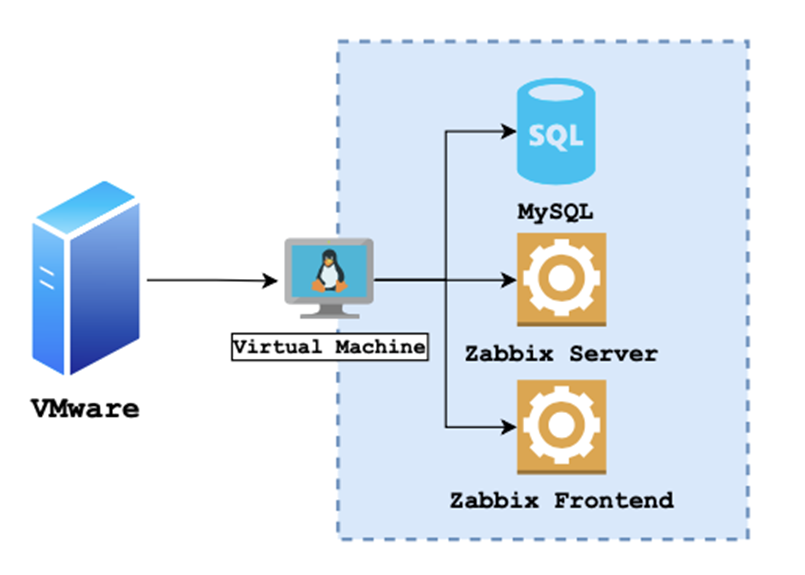
In this tutorial, we use a virtual machine with Debian 11 with the resources: 4GB of RAM, 2 vCPU and 50GB of Disk, which is more than necessary for a simple installation for case studies. Our installation will be all-in-one, that is, everything on the same server (Database, Zabbix Server and Zabbix Frontend).
Installation
Here are the commands we used in the installation video:
- Installation of utilities and zabbix-release package.
  #Instalação dos utilitários
apt install vim sudo curl -y
#Acesso ao diretório /tmp
cd /tmp/
#Baixar o repositório zabbix-releas

wget https://repo.zabbix.com/zabbix/6.0/debian/pool/main/z/zabbix-release/zabbix-rele
ase_6.0-1+debian11_all.deb
#Instalando o repositório zabbix-release
apt install ./zabbix-release_6.0-1+debian11_all.deb
#Update e upgrade no sistema
apt update; apt upgrade -y- Postgres database installation
#Instale os pacotes necessários para o banco de dados apt install postgresql postgresql-contrib -y

#Acessamos o usuário do postgres e entramos no banco e dados su - postgres
psql

#Definindo a senha do Postgres postgres=# \password postgres
Digite nova senha para postgres: <SENHA POSTGRES> Digite-a novamente: <SENHA POSTGRES>
postgres=# \q
$ exit
Now we’ve adjusted the Postgres ph_hba.conf file so that any change in the database will require the password that we just defined.
#Edite o arquivo pg_hba.conf
vim /etc/postgresql/13/main/pg_hba.conf

#Localize as seguintes linhas:
local all postgres peer
local all all peer

#Altere "peer" para "md5"
local all postgres md5
local all all md5
Restart postgres
#Restart no postgres
systemctl restart postgresql
Installation of Zabbix Server
#Instalação dos pacotes para o zabbix server
apt install zabbix-server-pgsql php-pgsql zabbix-sql-scripts zabbix-agent -y

#Criar o usuário/senha do Zabbix no Postgres su - postgres
createuser --pwprompt zabbix
Digite a senha para a nova role: <SENHA ZABBIX> Digite-a novamente: <SENHA ZABBIX>
Senha: <SENHA POSTGRES>

#Criar o banco de dados do Zabbix. Irá solicitar a senha do Postgres. createdb -O zabbix zabbix
Senha: <SENHA POSTGRES>

#Importamos o schema inicial e os dados.
zcat /usr/share/doc/zabbix-sql-scripts/postgresql/server.sql.gz | psql -U zabbix -d z abbix &>/dev/null
Senha para usuário zabbix: : <SENHA ZABBIX>
exit
After that, we add our Zabbix user password in the configuration file. Search for #DBPassword= uncomment and add your password
vim /etc/zabbix/zabbix_server.conf
#...
DBPassword=<SENHA ZABBIX>
#...
Installation of Zabbix Frontend
#Instalação dos pacotes necessários para o Zabbix Frontend
apt install nginx zabbix-frontend-php zabbix-nginx-conf php-fpm -y
Now, we tweak the Zabbix web config file
#Editando o arquivo de configuração WEB do Zabbix vim /etc/nginx/conf.d/zabbix.conf

#Descomente a linha "listen" para caso queira alterar a porta de acesso WEB do Zabbi x, por padrão é a porta 80.
# Descomente a linha "server_name" e adicione o IP do seu servidor.
server {
listen 80; server_name X.X.X.X;
Now we restart our services
#Habilite os serviços para que eles iniciem em caso de reboot systemctl enable postgresql nginx zabbix-server.service

#Reinicie os serviços
systemctl restart postgresql nginx zabbix-server.service
Done! Now all you have to do is access it via the WEB and finish the configuration.
Installation and configuration via WEB
→ Go to http://IP_SERVIDOR/zabbix in your browser
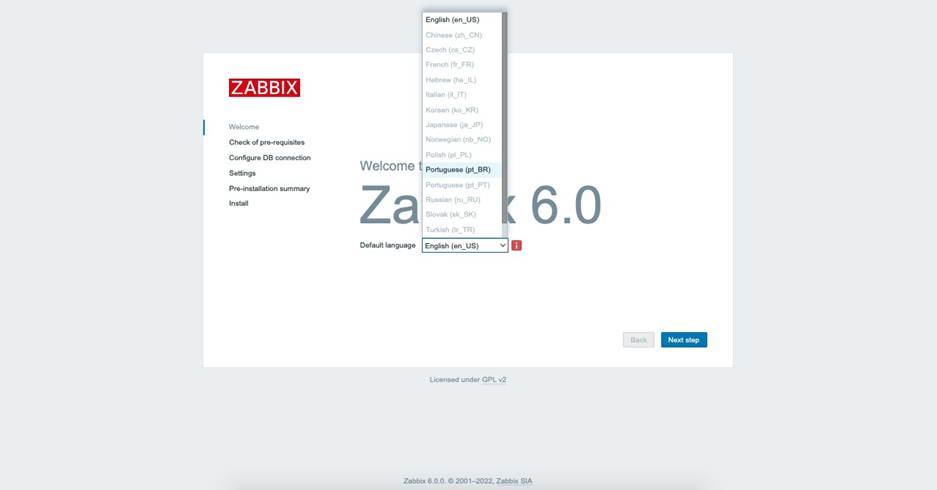
→ Select the language you want, in this case, I selected “Portuguese (pt_BR)”
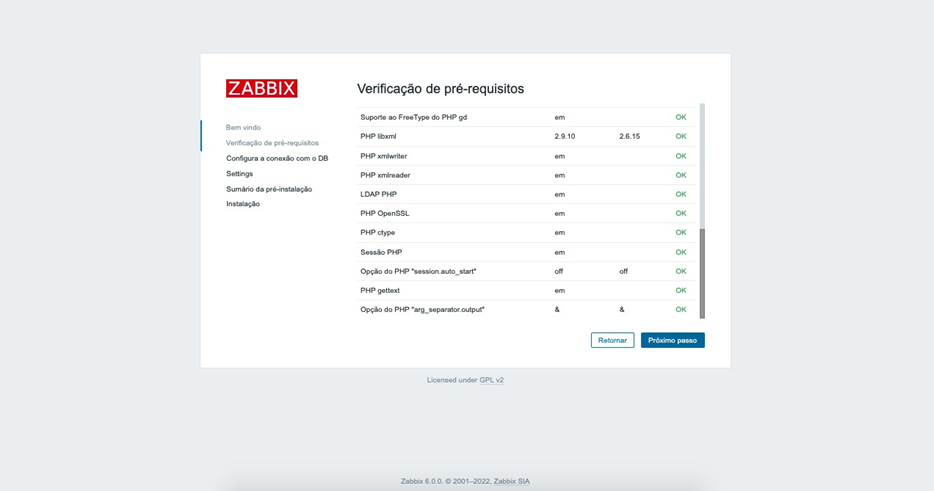
→ Checking the prerequisites, if everything is OK, proceed.
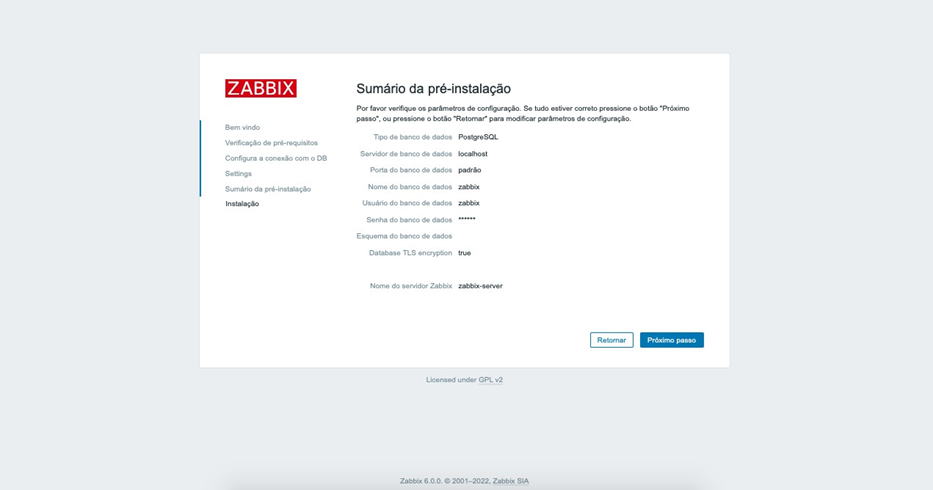
→ On the next screen, add:
- The database name
- Zabbix user
- Zabbix user password

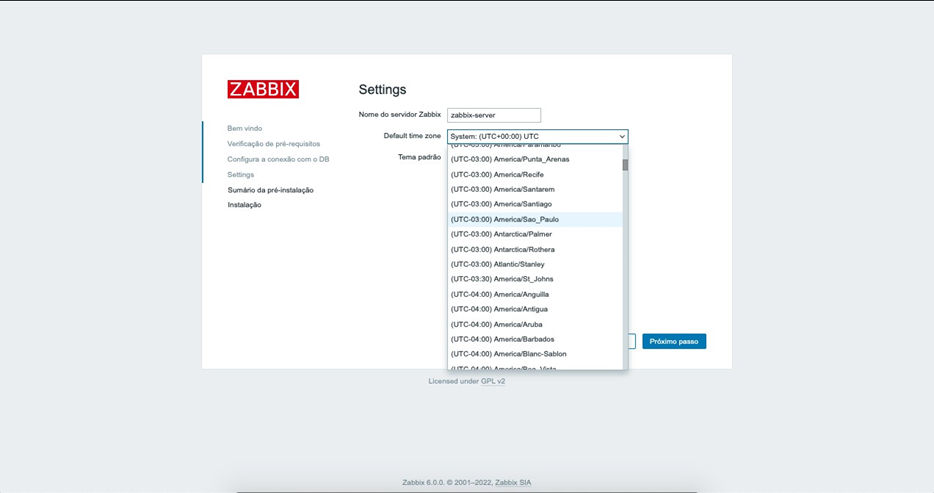
→ Define a name for the server
→ Also select a “timezone”, in this case, we add America/Sao_Paulo
→ Choose a theme (we leave it as default)
→ Summary/check of settings from previous screens.
→ Installation completed!
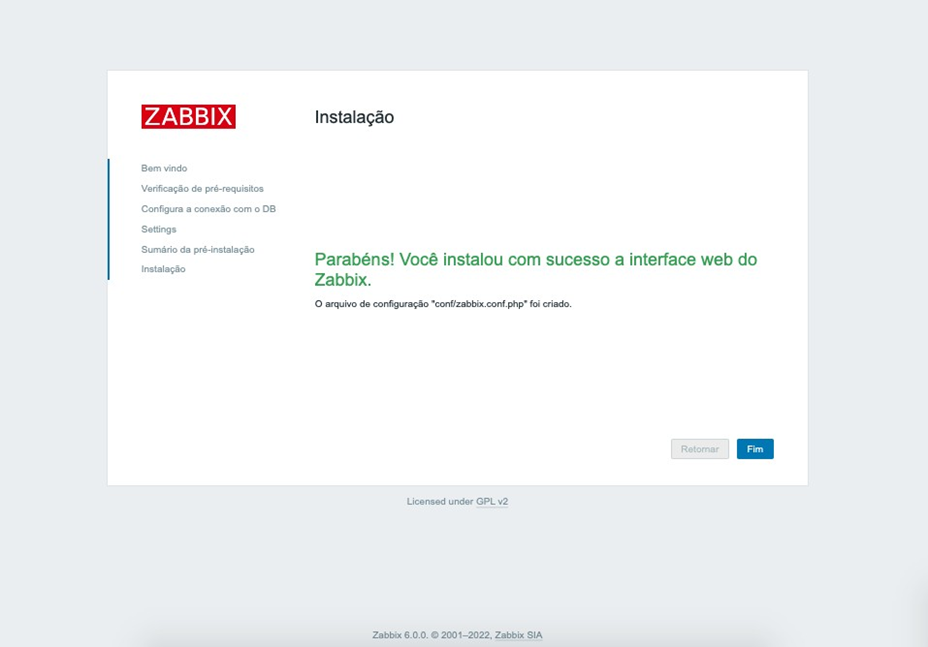
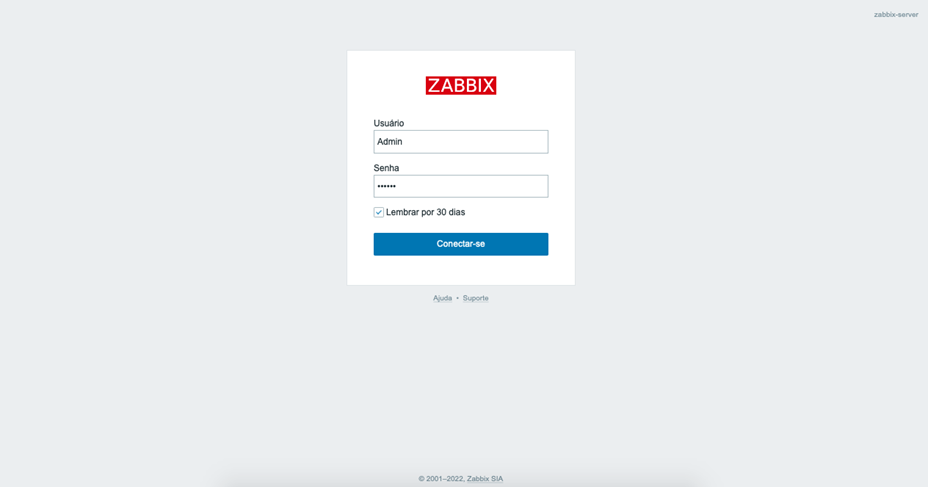
After the above steps, you will be redirected to the login screen. By default, credentials are:
- User: admin
- Password: zabbix
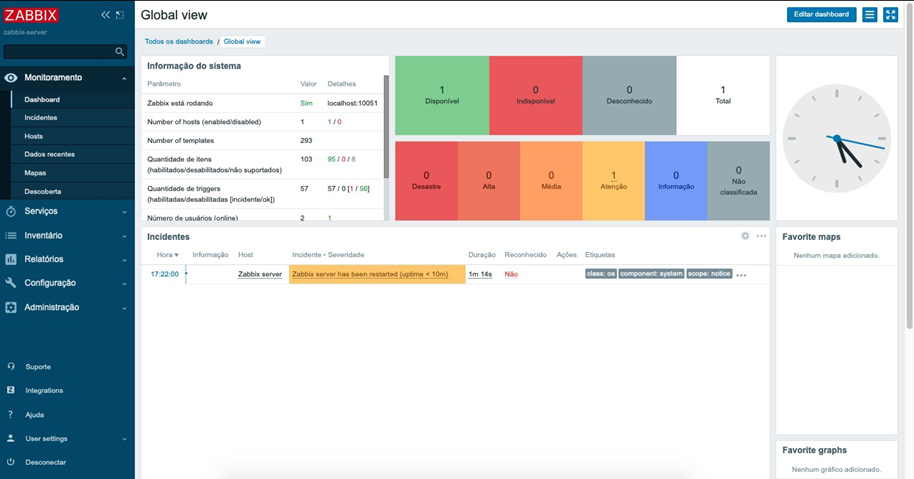
→ Completed installation and 100% functional Zabbix.
You can follow the configuration video on our youtube channel and if you still have questions about the configuration or the tool, please contact our team.