


Hi everyone, Bryam from Made4it here! As you know, we’re always on the lookout for new developments that could revolutionize the way we work, and today we’re really excited to share something that’s going to make life easier for all of us who work with infrastructure and virtualization. Every day we carry out various migrations for all kinds of companies, and this new feature will make our process much easier.
You asked for it, and technology delivered: migrating VMs from VMware to ProxMox just got much simpler and more intuitive! Forget about complicated commands and seemingly endless lines of code. Now, with just a few clicks, you can complete the entire process directly through the Web GUI.
Stay tuned—we’ll be breaking down everything about this innovation that promises to be a game-changer in our daily lives. Join us on this technological journey!
Introduction
Until then, migrating from VMware to ProxMox was a process done entirely via the CLI; we had to download a specific binary, establish communication with the destination VMware server , download the disk, convert it, import it into ProxMox, and attach it to a VM.
Seeing this massive shift of people choosing ProxMox, they took the opportunity to develop a new method for migrating VMs—and best of all, it’s entirely via the Web GUI, which has made the process much easier, since we no longer have to touch the server’s CLI at all!
This new option is available starting with ProxMox version 8.1.8, and the binaries that make this work are as follows: pve-manager version 8.1.8, libpve-storage-perl version 8.1.3, and the new pve-esxi-import-tools binary!
Updating
First, we need to have one of these repositories set up on our Proxmox: pvetest or pve-no-subscription
Select your Host > Updates > Repositories
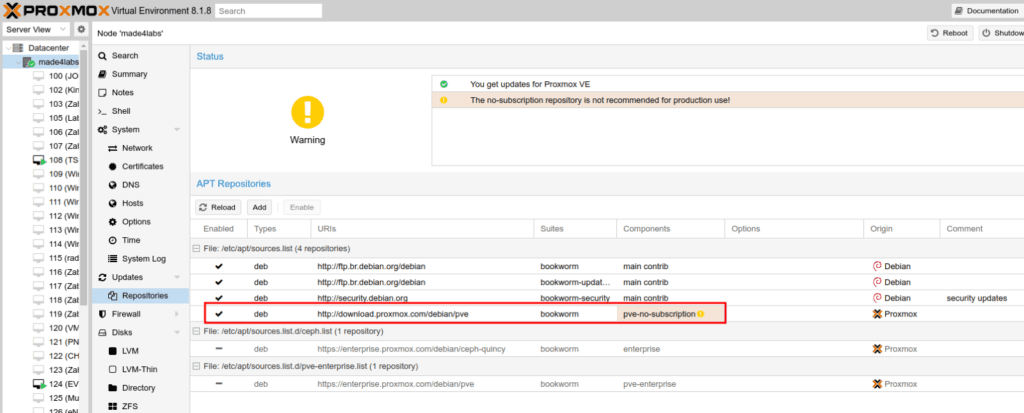
If you don’t have any of these repositories, simply go to the “Add ” option and select the ” Test” or ” pve-no-subscription” repository.
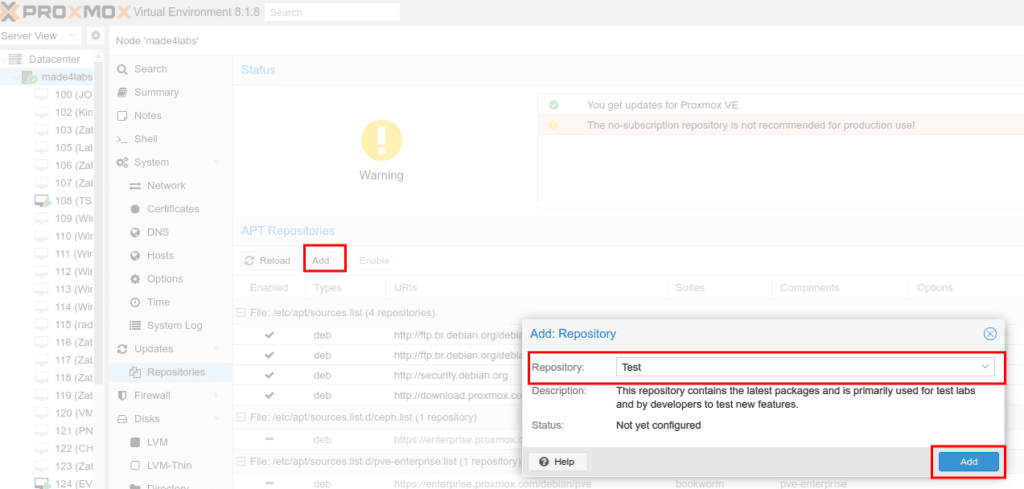
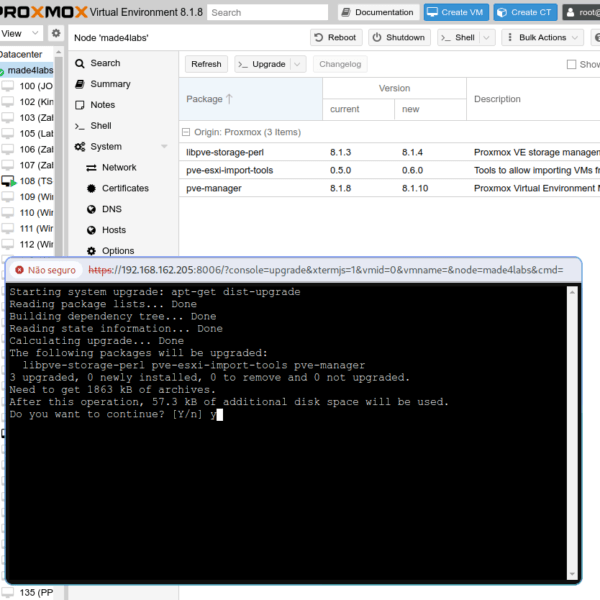
Once the repository has been added, simply go to the “Updates” option, select ” Refresh ” to get the latest packages, and then go to ” Upgrade”
ONLY UPDATE YOUR PROXMOX IF YOU ARE SURE OF WHAT YOU ARE DOING; IF NOT DONE CORRECTLY, THIS PROCESS CAN AFFECT YOUR ENVIRONMENT!! IF YOU HAVE ANY QUESTIONS, FEEL FREE TO CONTACT US!!
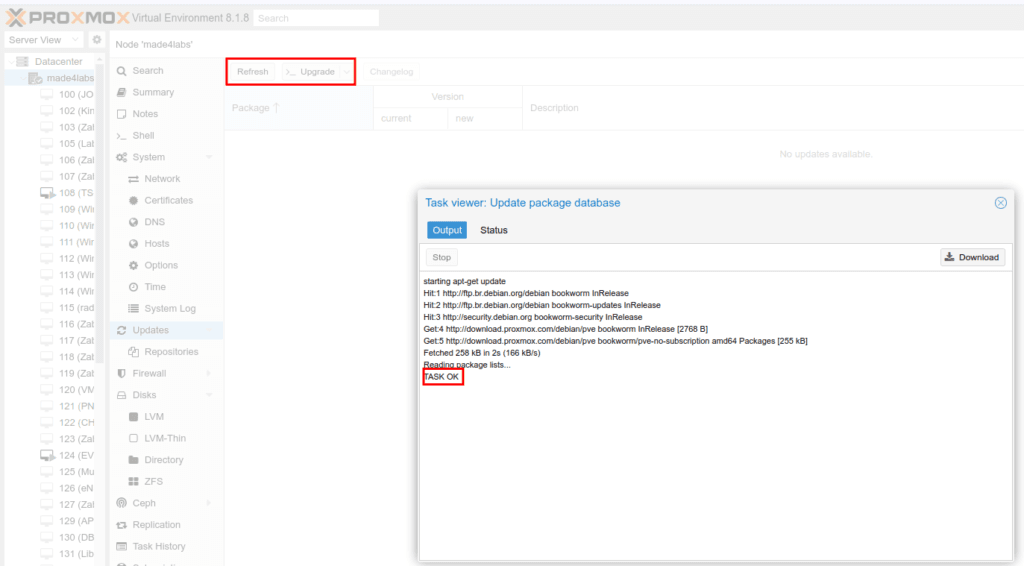
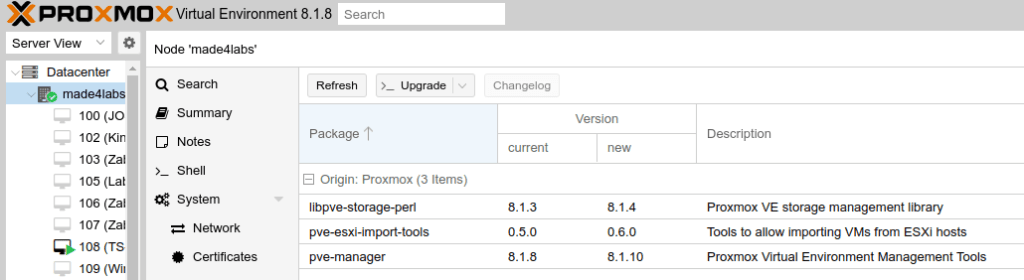
A pop-up window will open; simply configure the upgrade.
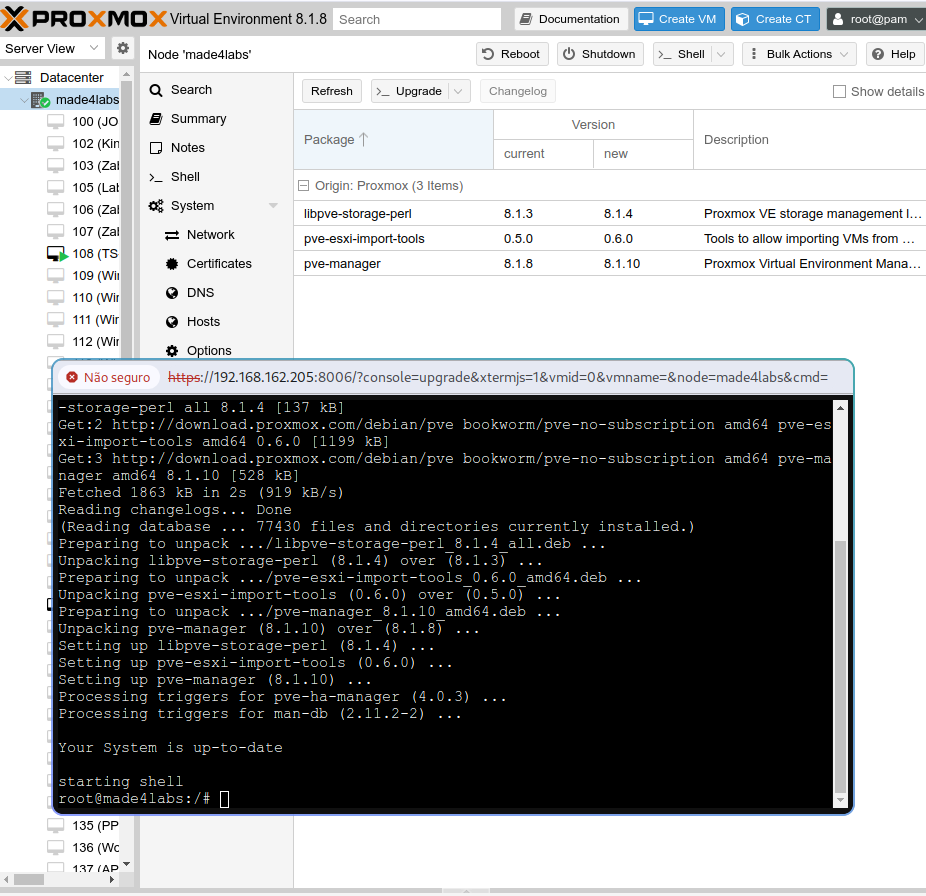
Once the upgrade is complete, we recommend rebooting your server so that it runs on the new kernel (if it was updated).
Communicating with VMware
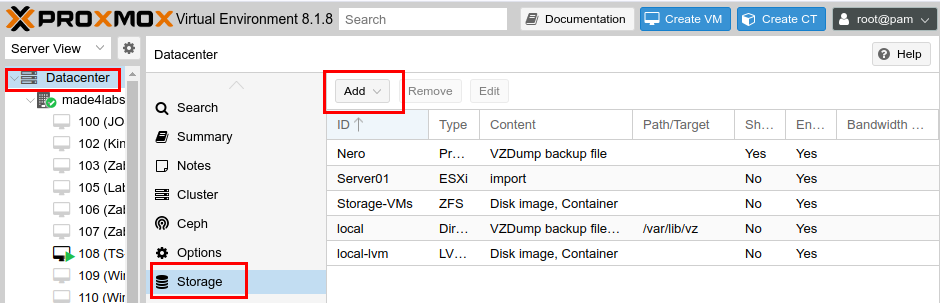
Communication with our VMware environment occurs via API, and to configure this, we need to go to:
Data Center > DataStore > Add > ESXi
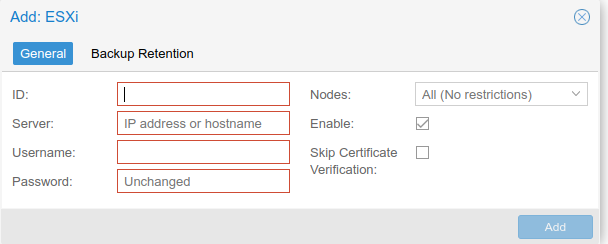
We will configure this new storage as follows:
- ID: Name of the storage that will appear in ProxMox (You can name it whatever you like)
- Server: IP address or domain name for accessing your VMware
- Username: User with VMware admin permissions
- Password: Password for a user with admin permissions in VMware
- Nodes: On which nodes (ProxMox servers) do you want to share this new storage?
- Enable: Whether the storage will be visible or not
- Skip Certificate Verification: If you do not have a valid certificate configured on your VMware, it is recommended that you check this box.
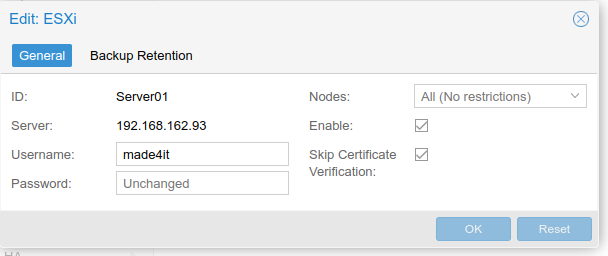
Once you’ve configured the storage, it will already be visible on your ProxMox servers.
Performing Migration
When you access Storage, a screen like this will appear:
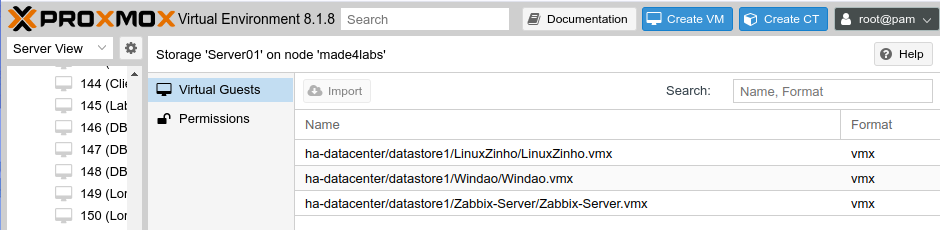
Basically, we’ll look at the existing VMs in your VMware environment. After that, just select the one you want to migrate and choose the ” Import” option.
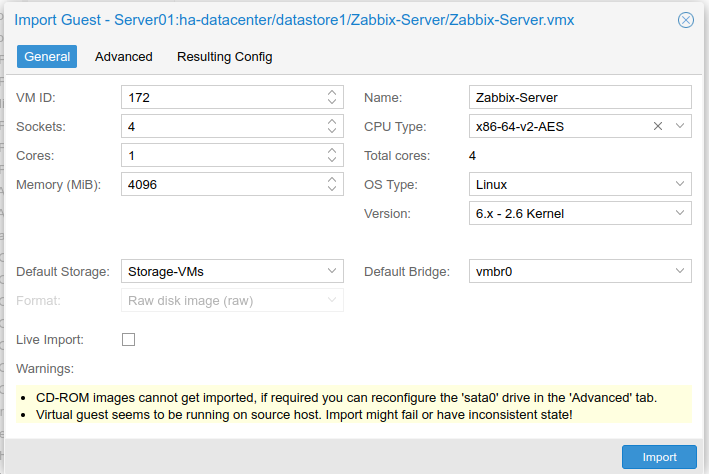
This screen will appear, showing the presets you want to configure before importing:
If the VM has a CD-ROM drive attached to it in VMware, it will not be migrated!
The VM cannot be migrated while it is running; you must shut it down first (in VMware)
- VM ID: The VM ID that will appear in ProxMox
- Sockets: How many physical CPUs do you want to allocate to this VM?
- Cores: How many CPU cores do you want to allocate to this VM?
- Memory (MiB): How many MiB of memory do you want to allocate to this VM?
- Default Storage: Which ProxMox storage do you want to use for this VM?
- Format: Availability depends on the type of storage.
- Name: The name of the VM that will appear in ProxMox
- CPU Type: What type of processor do you want to use in your VM?
- Total Cores: Summary of how many cores your VM will have
- OS Type: What type of operating system will this VM run?
- Version: What is the kernel version of this VM?
- Default Bridge: Which ProxMox network interface this VM will be connected to.
After making the changes you want, just click ” Import ” and wait.
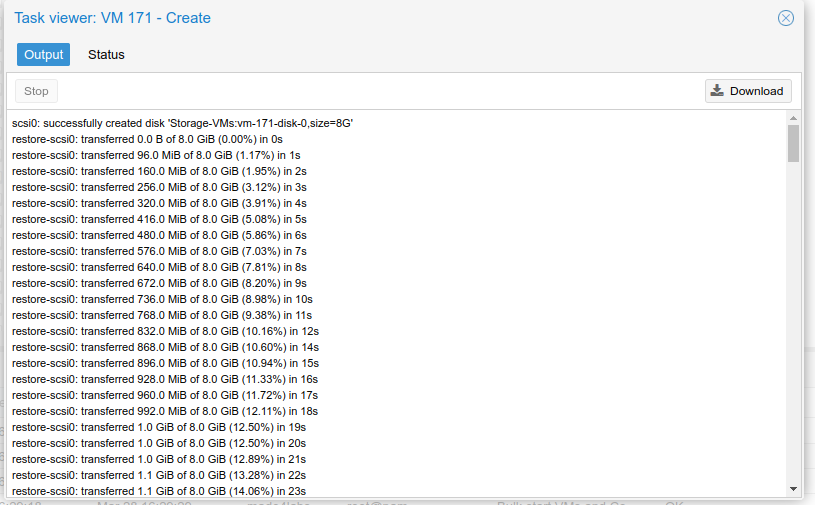
Once the import is complete, your VM will be ready to use!
Live Import
To minimize downtime—since we need to shut down the VM that is going to be migrated—ProxMox has introduced the Live Import option, which allows us to power on the VM during the import process and have it up and running right away, simulating the Live Restore feature already provided by ProxMox Backup Server.
More information
- The supported, certified versions range from VMware 6.5 through 8.0
- We do not recommend registering vCenter, as the import process will take much longer.
- It works with the ESXi FREE license
- New data written during the Live IMPORT is not lost
- The VM to be migrated must be powered off!
So, are you interested in simplifying your VM migrations? Made4it is here to ensure that your transition to ProxMox goes as smoothly as possible. Don’t let your questions hold you back! Contact us and we’ll schedule a call to explain everything you need to know.
Still not convinced? Check out our post “VMware vs. ProxMox – Which One Should You Choose?” on the Made4it blog. There, we detail the advantages of each system so you can make the best decision for your situation.
Remember, Made4it is an expert when it comes to virtualization. We’re here to help you reach new heights with ProxMox. Contact us right now and take your infrastructure to the next level!
