


Now that you know what a BGP blackhole is (if you don’t already know, check out our article on RTBH – Blackhole), it’s time to configure it on Mikrotik and protect yourself from DDoS attacks.
To summarize the Blackhole, it is a technique of sending a route to the “black hole” or simply making the router discard packets directed to that IP.
Now that I know what it is, the question is: how do I set up Blackhole on my router? In today’s article, we’ll show you how to configure Blackhole on Mikrotik routers running RouterOS.
To do the Blackhole manually we have some steps that are:
- Identify the attacked IP
- Create route to blackhole
- Advertise this blackhole route via BGP to your carriers/upstreams
You can automate all of this with Made4Flow, already closing a direct session and not having to do manual work.
If you want to know how to automate everything with Made4Flow, check out our next article.
So let’s go to the settings:
1 – Identify the attacked IP
You can use some of Mikrotik’s own tools like Torch or use a Netflow Software that has a DDoS attack sensor like Made4Flow
Via Torch, go to Tools -> Torch and choose the interface where you are being attacked
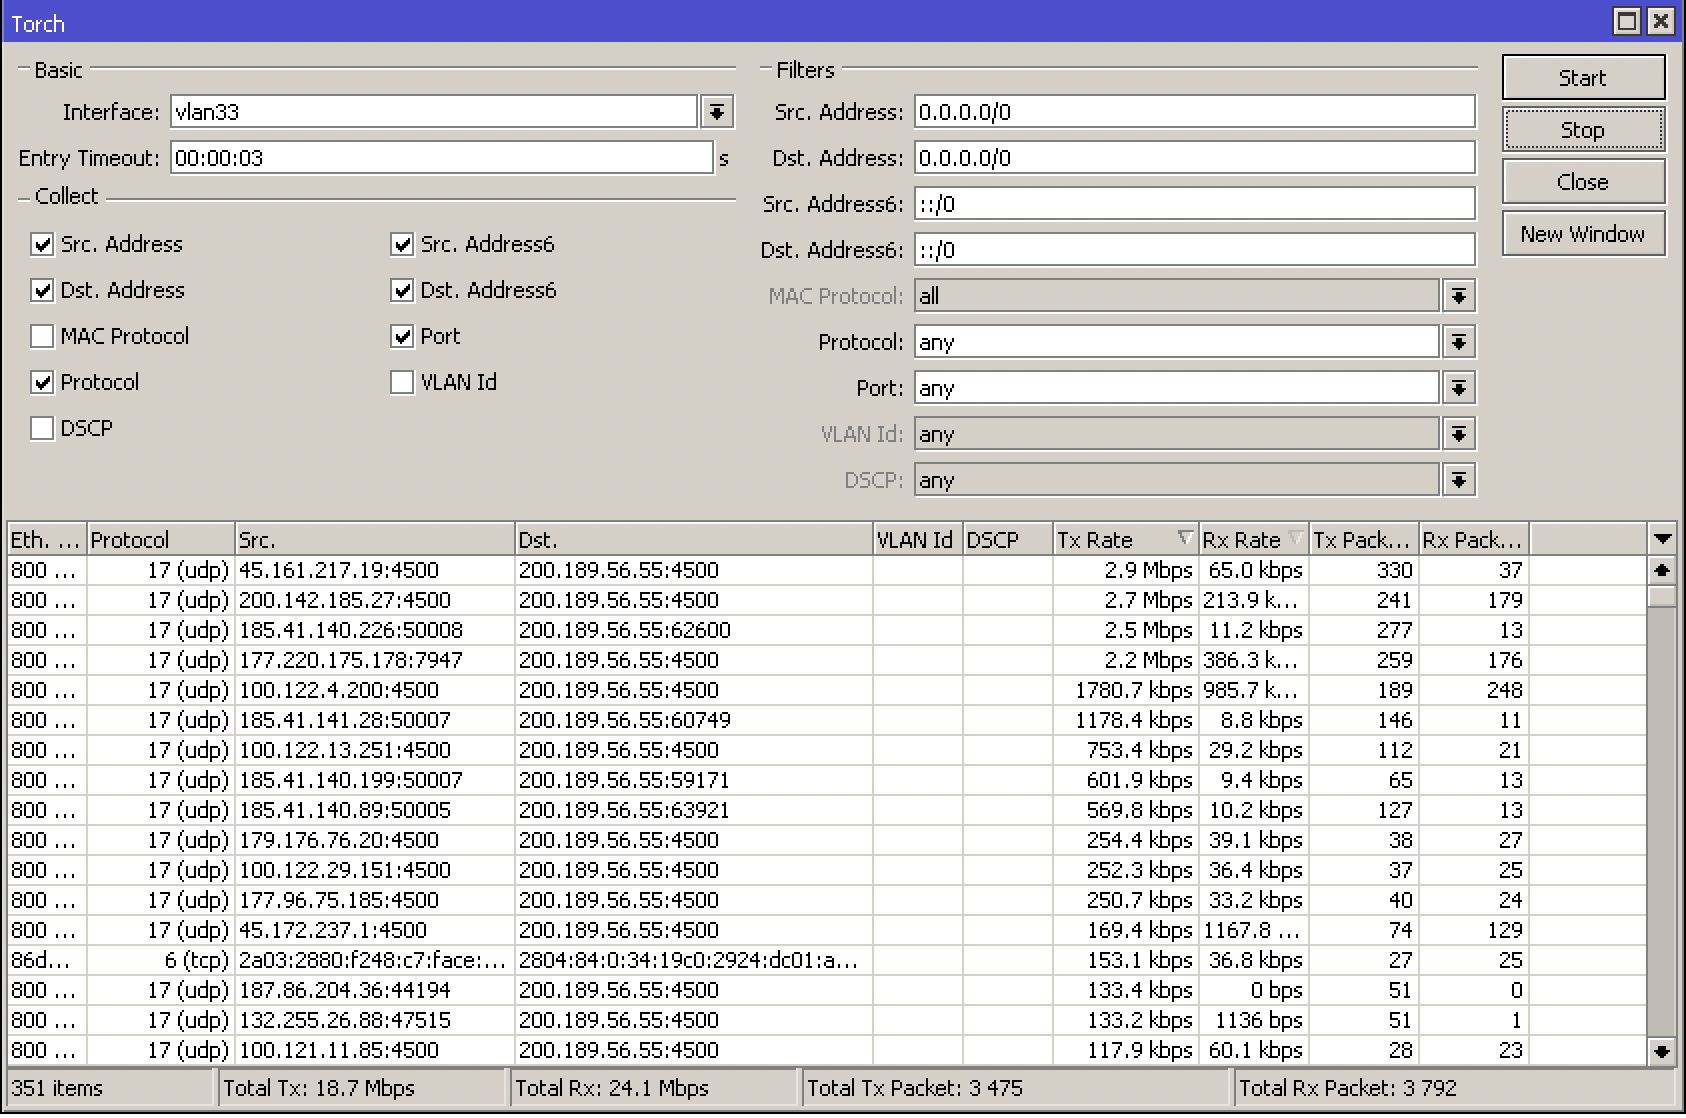
Or in Made4Flow in a simple way by accessing Anti-DDoS -> Active Anomalies
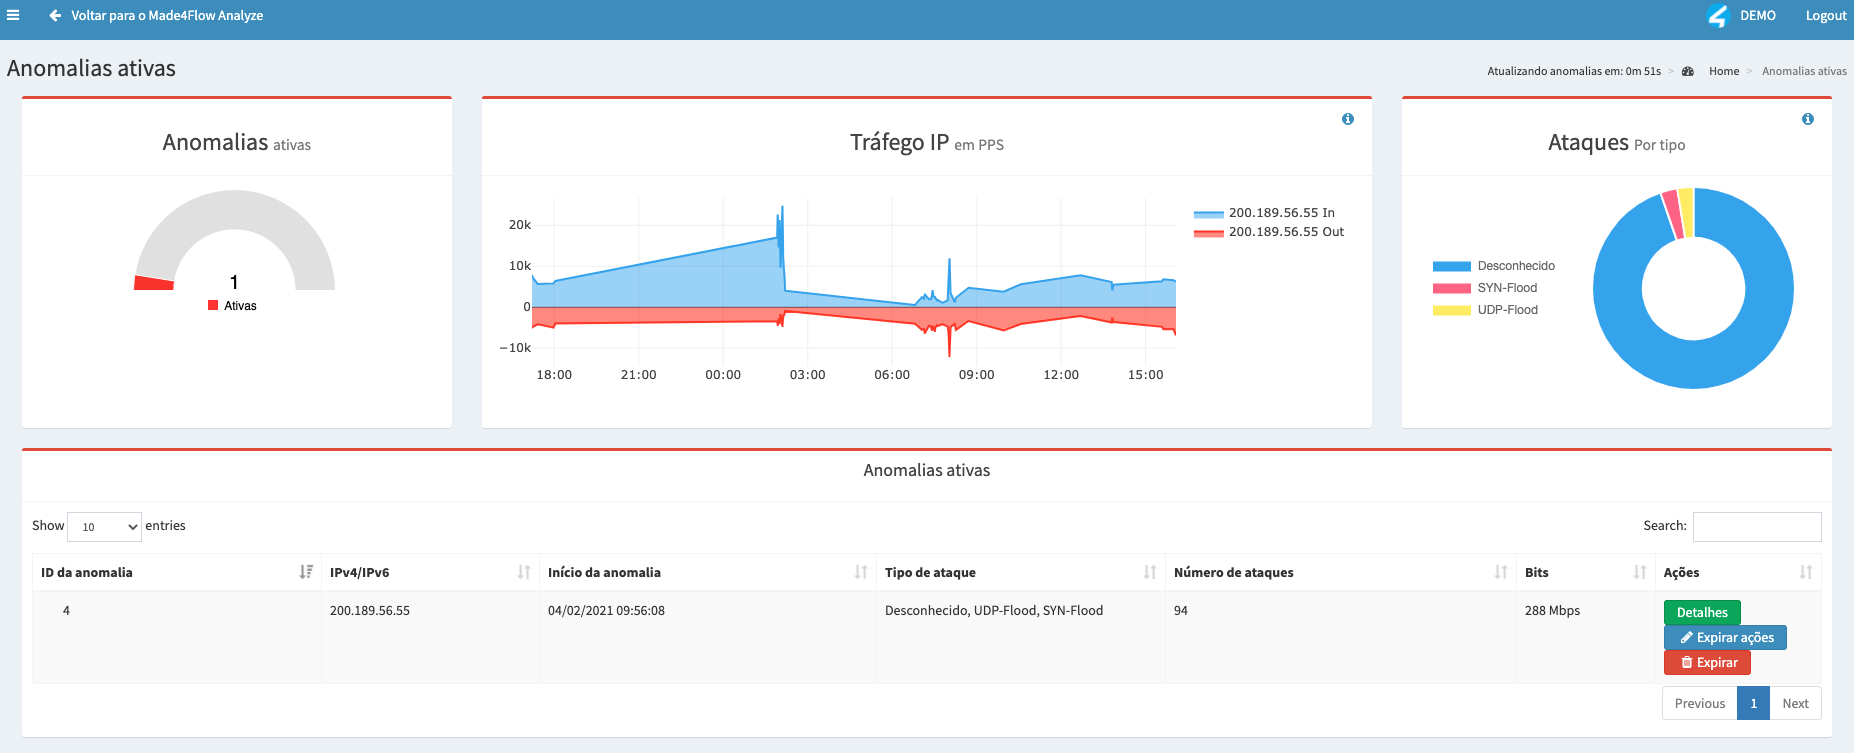
The attacked IP was: 200.189.56.55 (Example)
2) Create a route to blackhole
After identifying the IP attacked via Torch or via Made4Flow, now it’s time to create the route on your Router
For that go to IP -> Routes and add a new Route
Let’s assume that the attacked IP is 200.200.200.1, let’s create the route as follows
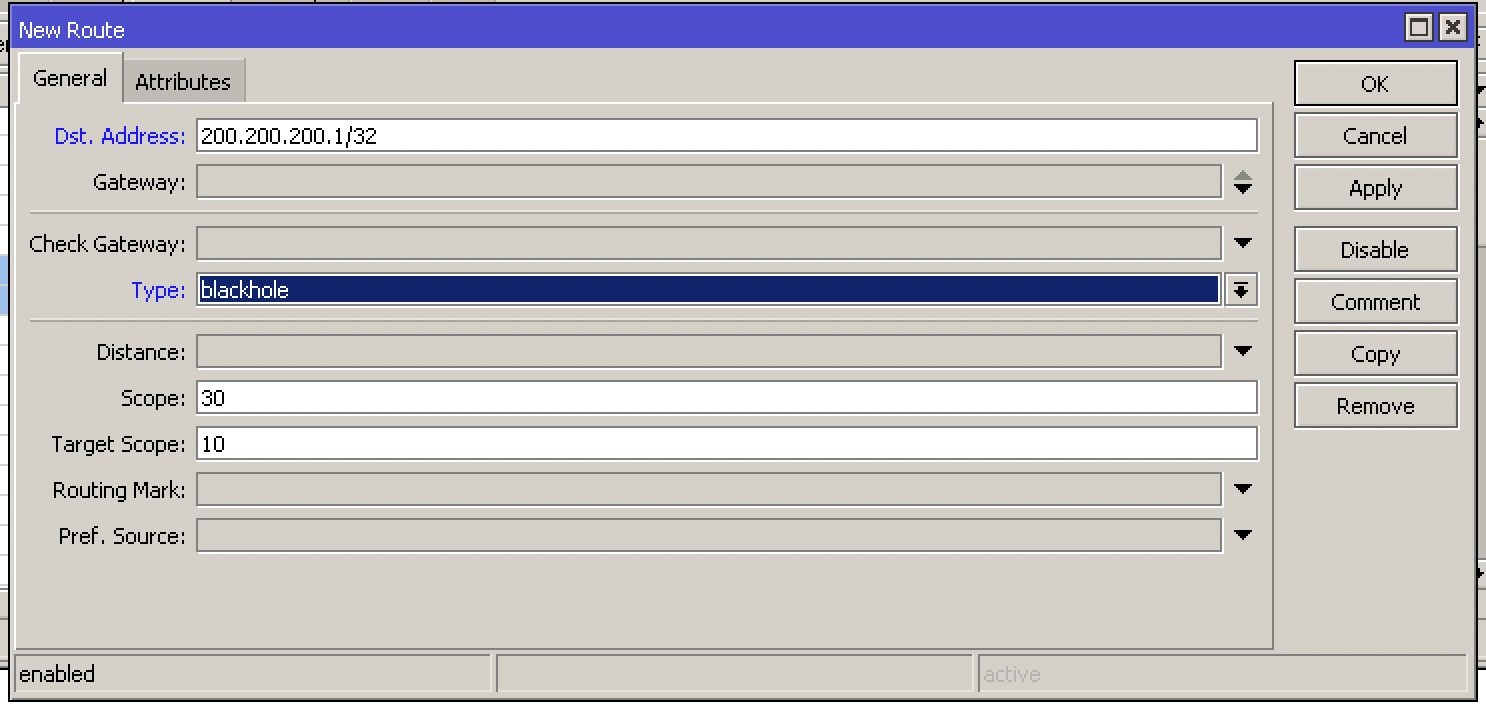
Add the Dst-address as 200.200.200.1/32 to specify that it is only that specific IP address and the type is Blackhole.
Or via terminal with the following command:
/ip route
add distance=1 dst-address=200.200.200.1/32 type=blackhole
After applying the route in blackhole this IP will STOP WORKING!
3 – Advertise this blackhole route via BGP to your carriers/upstreams
After identifying and blackhole the route you need to advertise via BGP to your operators/upstreams.
For this we have a few steps:
- Create the Route for BGP
To do this go to Routing -> BGP -> Networks and add the route that is in blackhole
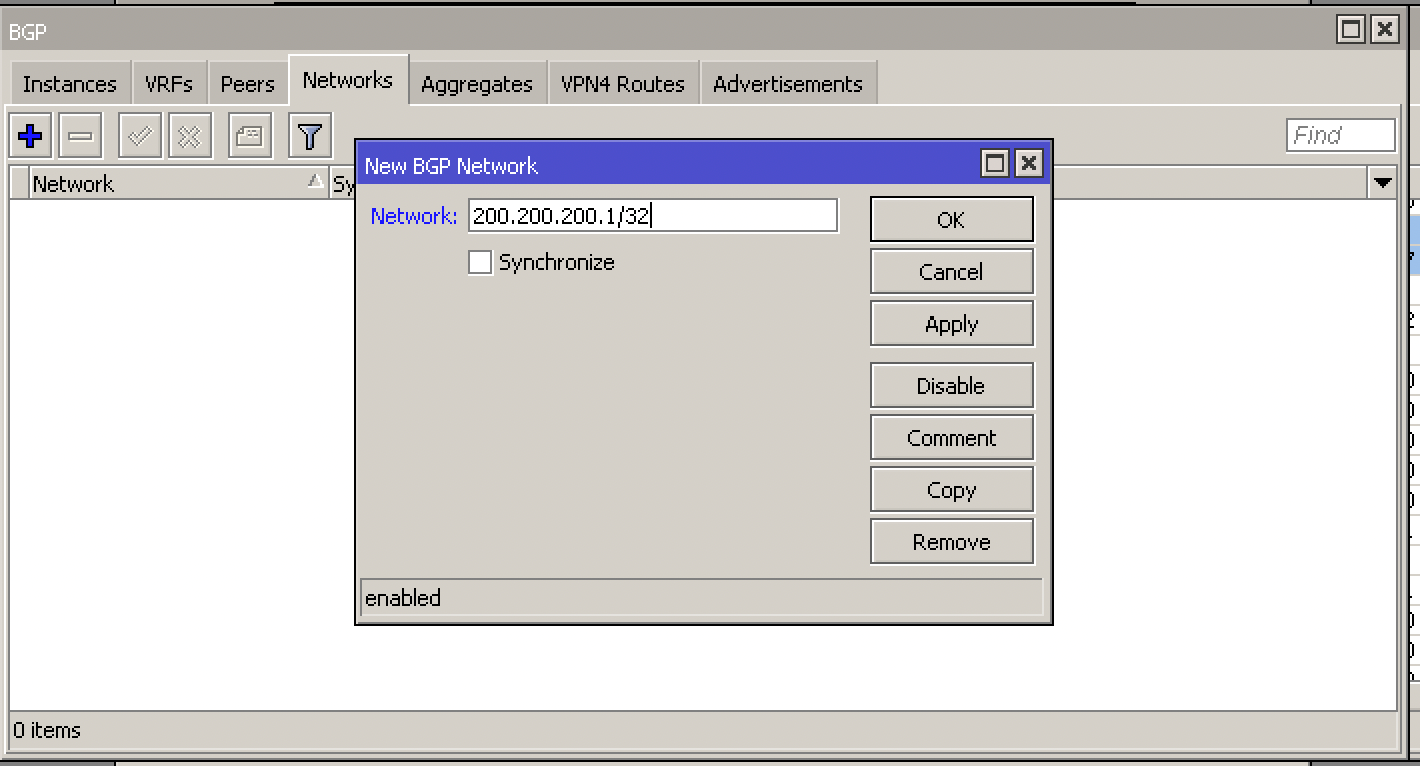
In our example the attacked IP was: 200.200.200.1/32
Or via command:
/routing bgp network
add network=200.200.200.1/32 synchronize=no
- Configure your Route-Map or Filters to send the advertisement
Enter Routing -> Filters and add the new Filter. In our example, the Filter of our operator XPTO has the name TRANSITO-XPTO-OUT and we are going to add it to send our blackhole route:
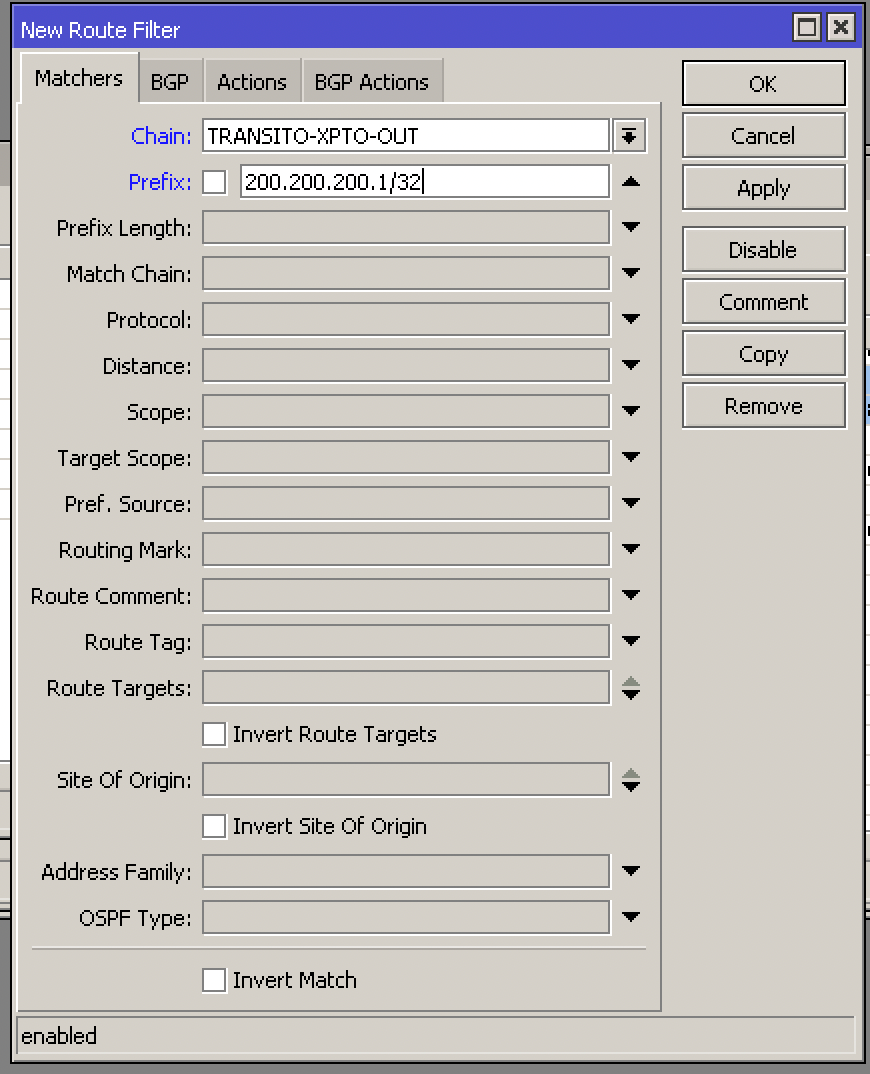
Add the IP attacked with the mask /32 in Prefix
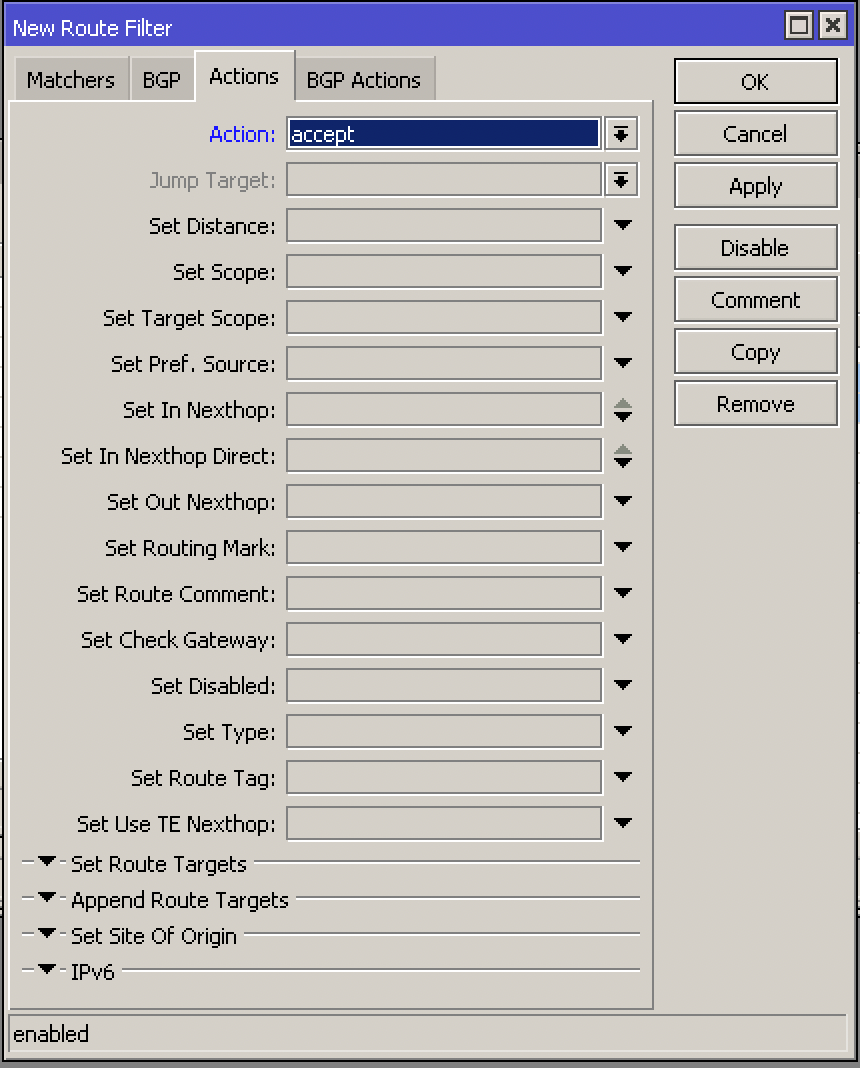
In Actions we will mark it as Accept to accept sending this route
And finally, in BGP Actions, add our carrier’s community:
Our carrier, XPTO, uses the BGP community 666:666 to send traffic to Blackhole
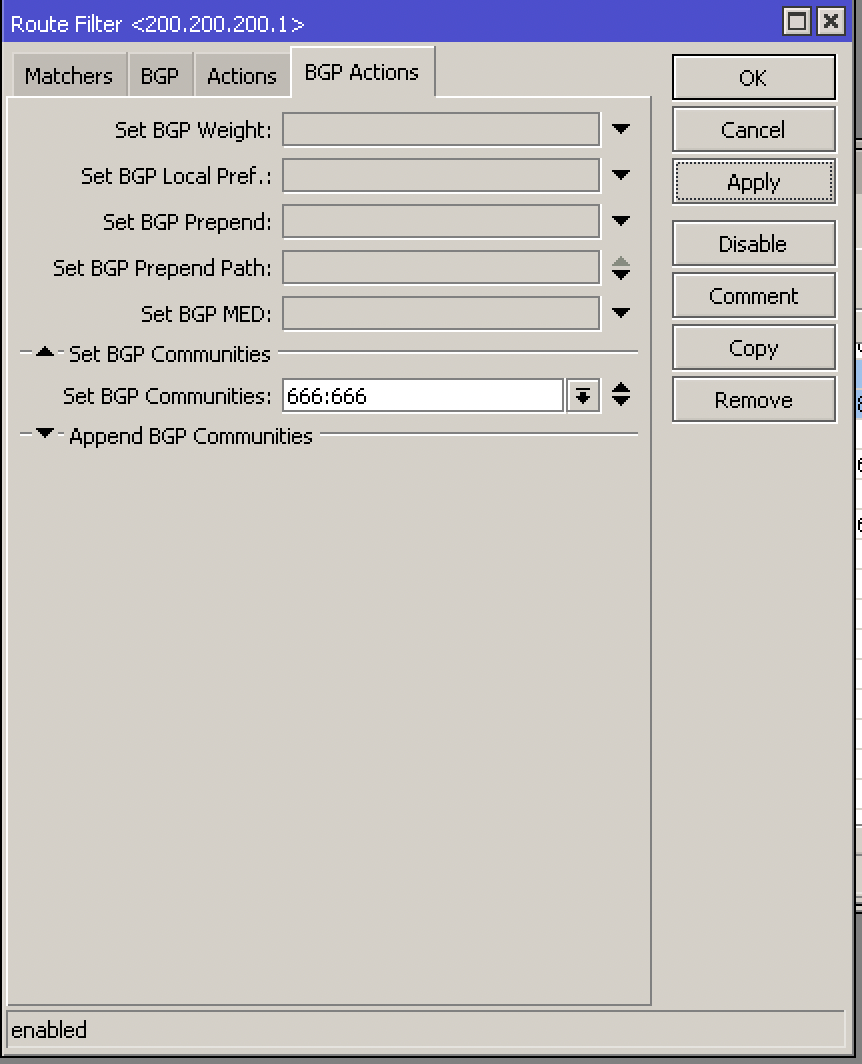
Via cli it looks like this:
/routing filter
add action=accept chain=TRANSITO-XPTO-OUT prefix=200.200.200.1 set-bgp-communities=666:666
Tip 1: Don’t forget to change the rule’s order (number) so that it appears before the total discard/reject filter. RouterOS reads the filter rules in numerical order, starting with rule 0.
Tip 2: Talk to your operator to find out which BGP blackhole community they use
Once this is done, the IP will remain in blackhole and announced to your operator, the attack will cease if it goes to this single IP.
To make things easier, we’ve included the video below, which shows you step-by-step how to configure Mikrotik with Blackhole
If you have any questions, be sure to contact us via WhatsApp, social media, or email.
See you next time!
