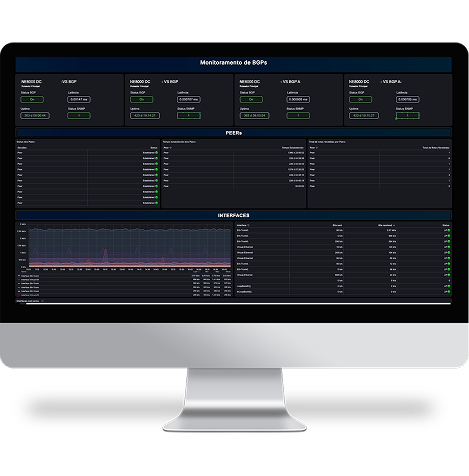
Updates – Made4Graph, Made4Flow, and Made4OLT – July 26

Made4Flow – Version 2.2.0 Additions: A new setup wizard has been added for new installations. Added the display of images of exporter models to the router registry. Automation has been added to the router registration fields to make it easier to add and configure new equipment. Added a test to verify NetFlow packet reception to confirm that the configuration is applied correctly. Changes: The tests performed during SNMP collection have been modified, and diagnostics have been added for any errors that occur. The restriction on community and extended community tagging has been removed from the Anti-DDoS manual BGP route announcement. Fixes: Fixed an issue in the list of responses triggered by an anomaly where responses without actions were displayed. Fixed an issue where prefixes without a registered aspath in Anti-DDoS were displayed. Fixed the connection to FTP servers using passive connections. Made4Graph – Version 2.3.8 Added: Added a filter by status to the list of Devices Connected to the LAN Changed: The method for updating CPE information has been changed; a TAG is no longer used. The name in the system menu has been changed from “CGNAT Logs” to “CGNAT Events” > “Port Overflow” Updated after running a traceroute, as some CPE models might not accept a blank “Interface” field. Adjusted: In the “Connection History,” the display unit for historical traffic has been corrected from Mbps (megabits) to MBps (megabytes). The number of connected clients for certain CPE models has been corrected in the “Connected Devices” graph on the LAN. Note: The setting has been changed so that the chart displays only the devices that were “Connected” during that period, provided the CPE supports this option. If it does not support this option, the chart will display the total number of devices that were connected. Fixed an issue that could occur when attempting to create a port redirect on certain CPE models. Fixed an issue that occurred when deleting a template linked to one or more CPE models.Note: The models would appear as “Not registered.” Fixed an issue that could occur when attempting to create a DMZ on certain CPE models. Made4OLT – Version 1.0.1 Added: Added OLT chart screen Added a screen for managing and registering new users Created UN Profile and OLT Profile Option to register new users in the system has been enabled Viewers were created in the database to improve software performance and speed up data access and manipulation Optimized migrations and seeders Added Furukawa 3008 provisioning commands Added Furukawa 3032 provisioning commands Added ZTE C300 provisioning commands (testing phase) Added ZTE C650 provisioning commands (testing phase) Changes: Standardized system buttons, making the interface more intuitive and streamlined Fixes: Fixed a bug related to changing the company name in the registry Fixed a bug that prevented adding more users to the system.

How to Configure Huawei EG8145X6 ONUs Using TR069

Today I’m going to show you how to configure your CPE eg8145x6 using Made4Graph’s TR-069. I recommend that this be done at a workstation using a public IP address, since it will need to be approved. To do this, we’ll update some information in your CPE using the TR-069 form; we don’t want a customer to be left without internet service. Before beginning the configuration, it is essential that there be no “NAT” of any kind on the network between the CPE and the TR-069 server; if there is, it will compromise TR-069 functionality, as stated in the protocol documentation. Now that I’ve completed the prerequisites, let’s set up the CPE. When accessing the CPE, go to the Configuration tab —> System Management—and then select TR 069. When you reach the screen shown below, we will make the following settings: CWMP Settings:→ The “Enable ACS Management” checkbox must be checked→ The “Enable Periodic Informing” checkbox must be checked→ Informing interval = 300→ ACS URL = http://ip_do_acs:7547→ ACS username = admin→ ACS password = admin→ Connection request username = admin→ Connection request password = admin After that, click Apply.

How do you request an ASN from your provider?

In this guide, we explore all the steps required to apply for an ASN from your Internet service provider. Keep in mind the importance of this unique number in improving connectivity and controlling your network. Be sure to research local requirements, prepare the necessary documentation, fill out the application form correctly, and wait for approval. Once you have obtained the ASN, implement it properly in your network to take full advantage of the benefits it offers.

Court Case No. 1023028-91.2023.4.01.3400 – Full and immediate suspension of website operations

Anatel has received several requests from the judiciary to take websites offline. Some of these requests come from the Federal Supreme Court (STF) and others from the Superior Electoral Court (TSE). All of the cases are listed in the agency’s electronic case management system. All requests follow a standard pattern: the higher courts order the blocking of websites they deem to contain some legal or electoral violation. In such cases, the regulatory agency is notified and is then required to issue the directive to the more than 10,000 internet service providers in Brazil, including small providers (PPPs) and major operators. As a result, Anatel is responsible for monitoring and ensuring compliance with the judicial branch’s decision, and may even impose sanctions on those who fail to comply. Naturally, this creates an administrative burden for the agency. Recently, some internet service providers have reported to us that they are receiving the following email from Anatel:Court Order—10th Federal Criminal Court of the Federal District Judicial Section. Full and immediate suspension of website operations. Court Case No. 1023028-91.2023.4.01.3400. If you received this email, please contact us to resolve this issue. If you’d like to learn more about this court ruling, watch the presentation given by our expert Douglas Fischer at GTER. To download the presentation as a PDF, click here.

Updates – Made4Graph and Made4Flow – June 15

Made4Flow – Version 2.1 Additions: Added the 95th percentile statistic to the custom charts. Added a backup routine for the tool. Added a new alert for interface classification when they are being monitored. Changes: Removed the option to display all records in a table.Removed the session timeout for dashboards and custom charts.Removed authentication restrictions for loopback collectors.Hidden SNMPv3 fields by default. Fixes: Fixed the query for the ASN-by-interface graph using the unmonitored filter.Fixed the queries for ASN-by-prefix, ASN-by-interface, and Interface-by-interface graphs.Fixed the statistics in the raw data for the general traffic graph.Fixed the language change on the login screen. Made4Graph – Version 2.3.6 Added: 1. Add a way to download the breakdown report asynchronously1.1 Sending an email in the system language used at the time of sending 1.2 Added “Send by Email” button 1.3 Retrieving the email address stored in the user’s account, with the option to change it. 1.4 Email created with the data. 2. Add integration with Made4OLT2.1 Integration Setup 2.2. Equipment Management Changed: Option to enable or disable port forwarding. The maximum MB limit for file uploads has been adjusted.The Routerbox API has been adjusted due to routing changes. Adjusted: Fixed an issue in the Firmware Upload where, when retrieving the Hardware Version and Software Version, the model sent was the “nickname” rather than the CPE’s “actual” model.Fixed an issue that occurred when changing the LAN IP address while the DNS field was blank.Fixed a persistence issue when dealing with a large number of CPEs; this is now handled in batches.

How to Configure TP-Link EC220-G5 Routers Using TR069

Today I’m going to show you how to configure your CPE EC220-G5 using Made4Graph’s TR-069. I recommend doing this in a lab environment, since it will need to be approved, and to do that we’ll be changing some settings on your CPE via TR-069—and we don’t want a customer to be left without internet access. Before beginning the configuration, it is essential that there be no NAT between the CPE and the TR-069 server on the network; if there is, it will compromise the functionality of TR-069, as stated in the protocol documentation. Now that I’ve completed the prerequisites, let’s set up the CPE. When you open CPE, go to the Advanced tab, then System Tools, and finally CWMP Settings. When you reach the screen shown below, we will make the following settings: CWMP Settings:→ The CWMP button must be enabled→ The information button must be enabled→ Information interval = 300→ ACS URL = http://ip_do_server_de_tr:7547→ ACS username = admin→ ACS password = admin→ Interface used by the TR-069 = Any WAN→ CPE ID = SN→ “Show SOAP Message” button = disabled→ The “Connection Request Authentication” checkbox = must be checkedIn the fields below the connection request box, you will be prompted for a username and password; you must use:→ Username = admin→ Password = admin→ Path = /tr069→ Port = 7547 The “Simple UDP Traversal over NATs” option can be enabled, but it does not need to be configured; the settings can be left at their defaults.After that, click Save. Shortly thereafter, the CPE should appear on made4graph, where it will be approved by our team Some information has been redacted to keep CPE data confidential. If you still have questions, send us a message, and we’ll help you with your CPE. Don’t have the TR069 yet?

How to Configure Intelbras RG1200 and Tenda AC10 Routers Using TR069

Today I’m going to show you how to configure your RG1200 CPE. “The same configuration can also be done on the Tenda AC10 CPE, since the graphical interface is similar,” using Made4Graph’s TR-069. I recommend that this be done at a workstation using a public IP address, since it will need to be approved. To do this, we’ll need to update some information in your CPE using the TR-069 form, and we don’t want a customer to be left without internet service. Before beginning the configuration, it is essential that there be no “NAT” of any kind on the network between the CPE and the TR-069 server; if there is, it will compromise TR-069 functionality, as stated in the protocol documentation. Now that I’ve completed the prerequisites, let’s set up the CPE. When you access the CPE, go to the Advanced Settingstab, then to TR069.When you reach the screen shown below, make the following settings: CWMP Settings:→ The CWMP button must be enabled→ The information button must be enabled→ Information interval = 300→ ACS URL = http://tr_server_ip:7547→ ACS username = admin→ ACS password = admin→ The “Connection Request Authentication” checkbox must be checkedIn the fields below the connection request box, you will be prompted for a username and password; you must use:→ Username = admin→ Password = admin→ Port = 7547 The STUN option can be enabled, but it does not need to be configured; the settings can be left at their default values. After that, click Save. Shortly thereafter, the CPE should appear on made4graph, where it will be approved by our team Some information has been redacted to keep CPE data confidential. If you still have questions, send us a message, and we’ll help you with your CPE. Don’t have the TR069 yet?

Updates – Made4Graph and Made4Flow – 5/22

Made4Flow – Version 2.0.4 Additions: Added the possibility to view the traffic of all CDNs at once Changes: Changed the color scheme on CDN traffic distribution graphs Fixes: Fixed returning logs after restarting Anti-DDoS Fixed timeout in BGP route action in Anti-DDoS Correction in the collection of interfaces via SNMPv3, the security level used for consultation Fixed aggregation of traffic by interface in the ASN graph by interface Made4Graph – Version 2.3.5 Changed: Changed DMZ activation by adding WAN interface in background. Adjusted: Fixed the collection of IPv6 speed tests for LibreSpeed databases.Fixed the expiration of pending schedules in bulk actions in TR-069.Fixed the display of the offline users report. Links to public wikis: https://wiki.made4it.com.br/pt-br/notas_da_versao/made4graphhttps://wiki.made4it.com.br/pt-br/notas_da_versao/made4flow_v2 Demos:https://demo.made4flow.com.br/demohttps://demo.made4graph.com.br/demo Still don’t have the tools and want to know more?

Made4it arises to meet the needs of the market, which has been demanding more and more personalized solutions.