


Now that you know what a blackhole is (if you don’t already know, check out our article on RTBH – Blackhole), it’s time to set it up and protect yourself from DDoS attacks.
To summarize the Blackhole, it is a technique of sending a route to the “black hole” or simply making the router discard packets directed to that IP. With the blackhole you can also announce these attacked IPs to your suppliers/upstreams and thus stop the attacks.
Now that I know what it is, the question is: how do I set up Blackhole on my router? In today’s article, we’ll show you how to configure Blackhole on Juniper routers
. To set up Blackhole manually, follow these steps:
- Identify the attacked IP
- Create route to blackhole
- Advertise this blackhole route via BGP to your carriers/upstreams
You can automate all of this with Made4Flow, which lets you close a session directly without having to do the work manually.
If you want to learn how to automate everything with Made4Flow, check out our next article.
Let’s go to the settings then
1 – Identify the attacked IP
You can do this through NetFlow analysis, such as in Made4Flow, by using the graphs and identifying—via the Raw Data Report—which IP address has the highest traffic and is likely the victim of the attack.
Within Made4Flow, go to the Interface by Application graph, for example, and then click on the port with the highest usage to identify which IP address is under attack
Or through Made4Flow, simply by accessing the Anti-DDoS module -> Active Anomalies
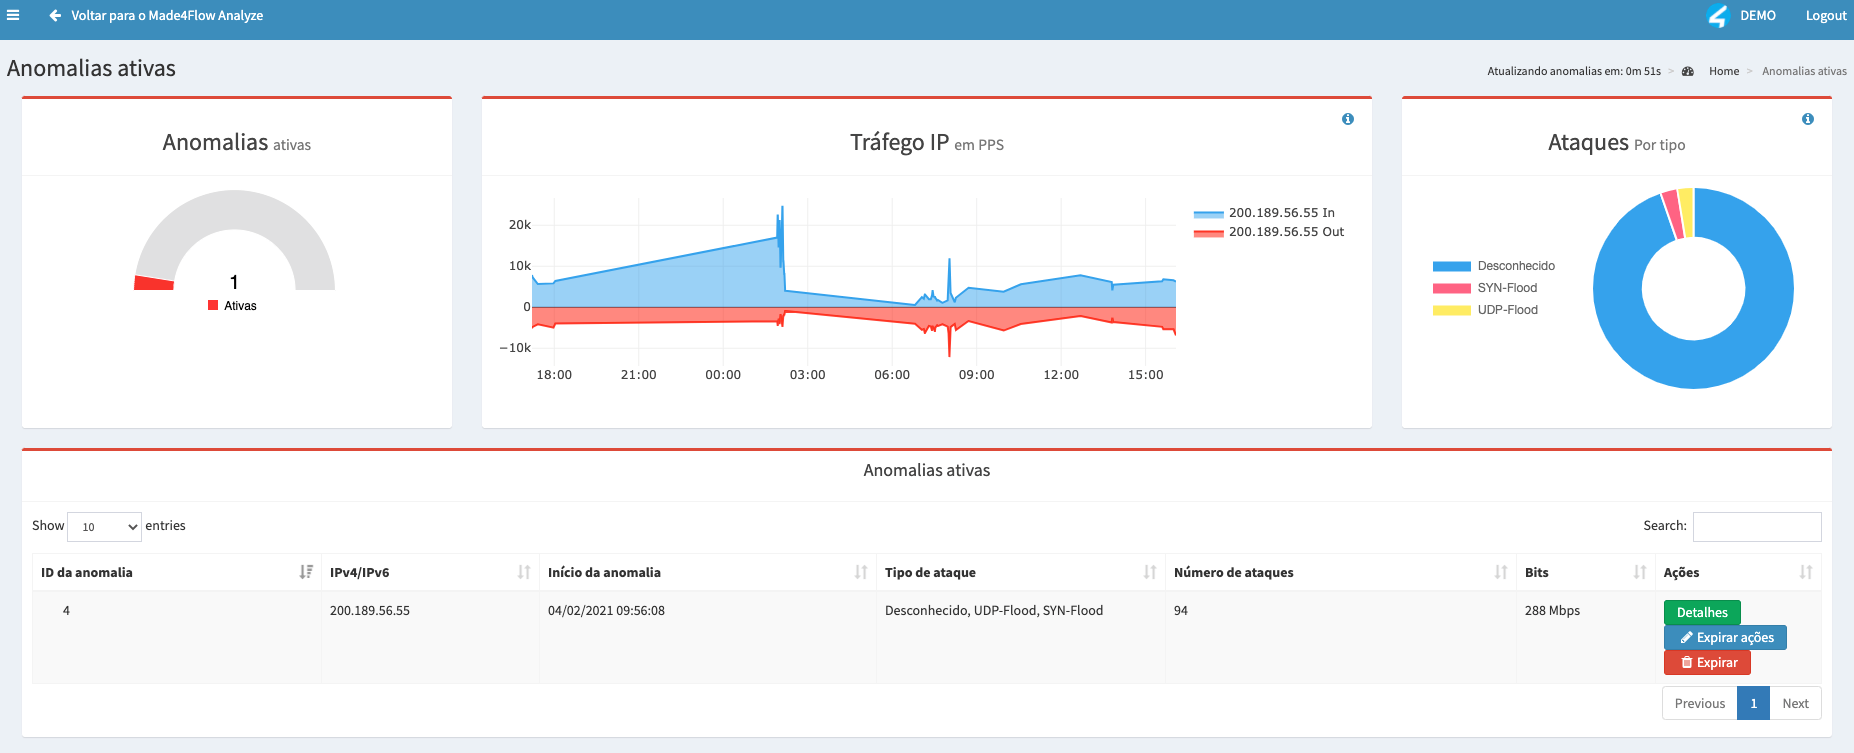
The attacked IP was: 200.189.56.55 (Example)
2) Create a route to Discard (Blackhole)
After identifying the attacked IP via Made4Flow it is now time to create the route in your Juniper Router to effectively play the IP to Blackhole or Discard
Let’s assume that the attacked IP is 200.200.200.1, let’s create the route as follows

Applied commands:
configure
set routing-options static route 200.200.200.1/32 discard
commit and-quit
After applying the route pointing to Discard that IP will STOP WORKING!
You can check the route using the show command:
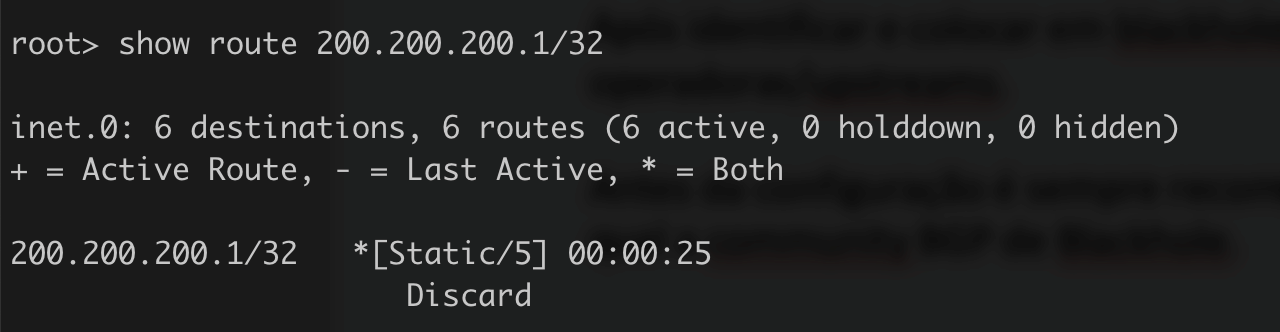
If the route is showing as Discard, you are already sending it to Blackhole
3 – Announce the IP in blackhole via BGP to your operators/upstreams
After identifying and blackhole the route you need to advertise via BGP to your operators/upstreams.
Before configuration, it is always recommended to contact your ISP/upstream provider to find out the Blackhole BGP community.
The BGP session with your ISP must be established.
For this we have a few steps:
- Configure your Carrier/Upstream Blackhole Community
To configure the blackhole community so that it can be used later, we need to run the following command:

Command:
set policy-options community cm_blackhole_operadora_XPTO members 666:666
commit and-quit
If you need to add more communities, use the same command, changing the name and number of the community
Tip: Talk to your operator to find out which BGP blackhole community they use
- Configure the policy-statement to Accept Blackole
To configure the sending of Blackhole in the policy-statement, you must first identify the policy used in the BGP session with the Operator and then configure to accept the Blackhole Route within a term
In our example, where the IP address 200.200.200.1/32 is under attack, we will use the following command:
Edit the policy:

Create a new term already with the attacked IP:

Next step is to accept the route within this term

Next step is to add the previously created community

The next step is to change the order of the policy so that the term containing the blackhole route is as high up as possible; we’ll use the insert command

We can validate with the show command that the configuration is correct:
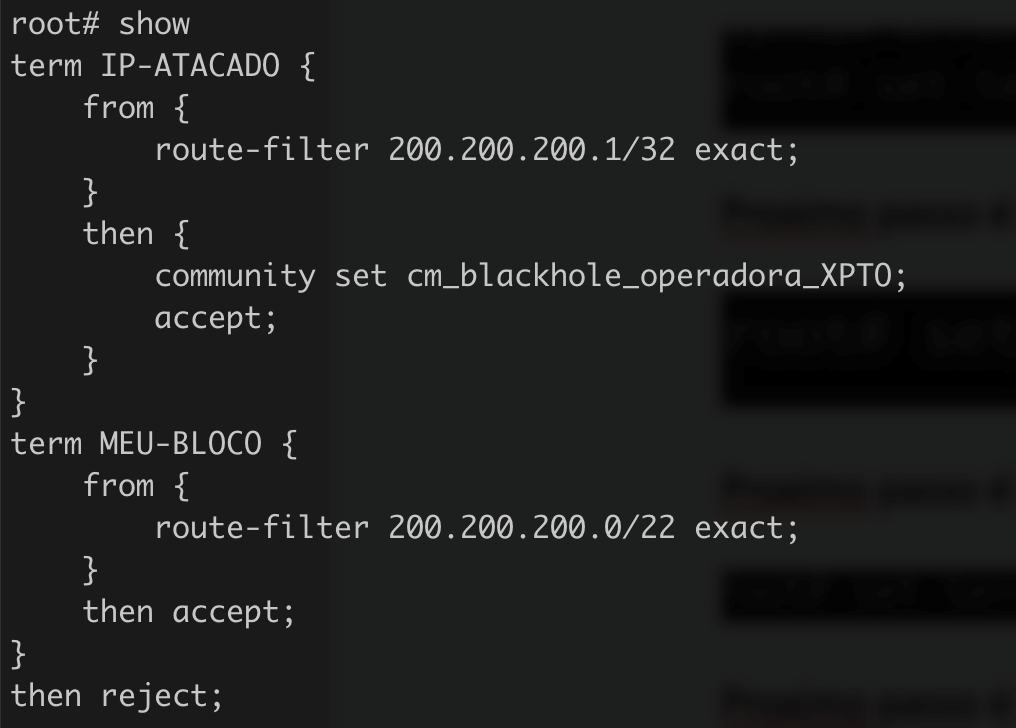
All commands used:
configure exclusive
edit policy-options policy-statement OPERADORA-XPTO-OUT
set term IP-ATACADO from route-filter 200.200.200.1/32 exact
set term IP-ATACADO then accept
set term IP-ATACADO then community set cm_blackhole_operadora_XPTO
insert term IP-ATACADO before term MEU-BLOCO
commit and-quit
You can validate if you are advertising the route using the command show route advertising-protocol bgp 192.168.100.1
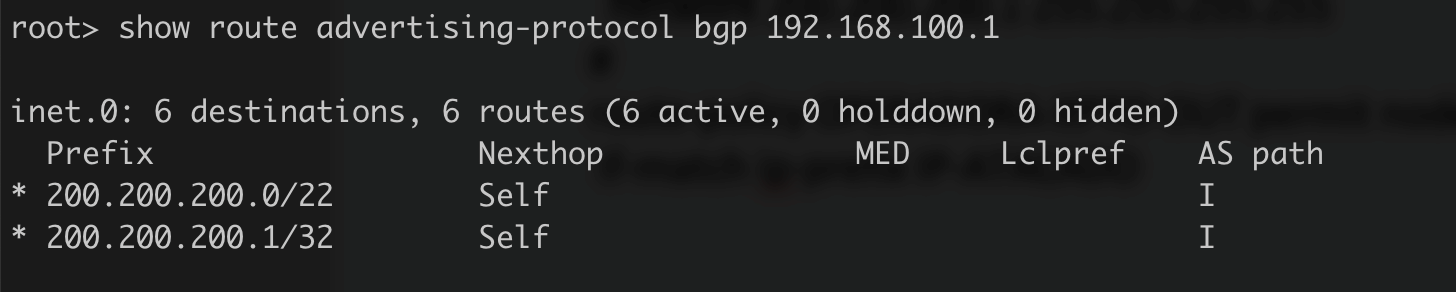
Once this is done, the IP will remain in blackhole and announced to your operator, the attack will cease if it goes to this single IP.
The complete configuration looked like this:
routing-options {
static {
route 200.200.200.0/22 discard;
route 200.200.200.1/32 discard;
}
autonomous-system 65000;
}
protocols {
bgp {
group OPERADORA-XPTO {
export OPERADORA-XPTO-OUT;
neighbor 192.168.100.1 {
description OPERADORA-XPTO;
peer-as 64700;
}
}
}
}
policy-options {
policy-statement OPERADORA-XPTO-OUT {
term IP-ATACADO {
from {
route-filter 200.200.200.1/32 exact;
}
then {
community set cm_blackhole_operadora_XPTO;
accept;
}
}
term MEU-BLOCO {
from {
route-filter 200.200.200.0/22 exact;
}
then accept;
}
then reject;
}
community cm_blackhole_operadora_XPTO members 666:666; }
Automating with Made4Flow
With Made4Flow, you can automate the process of reporting attacked IP addresses to the blackhole.
To do this, we need:
- Configure BGP session between Edge Router and Made4Flow
To configure the BGP session between the Router and Made4Flow, you need to create a Policy and then the BGP session
To configure policy, use the commands
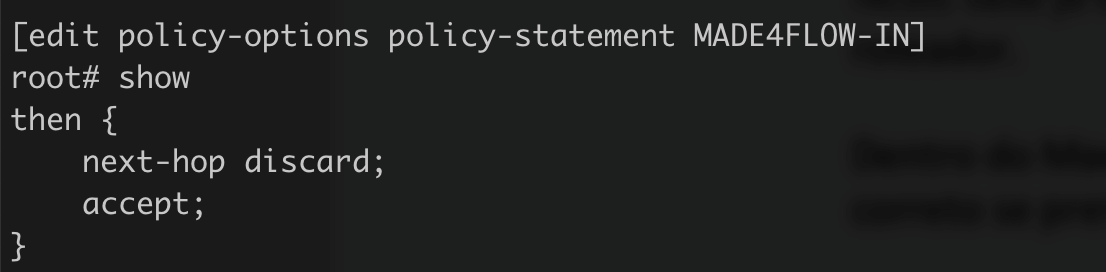
Commands used:
edit policy-options policy-statement MADE4FLOW-IN
set then next-hop discard
set then accept
commit and-quit
In this case, we have also already added the next hop manually on the router.
Within Made4Flow, you can already advertise with the correct BGP and Next-hop community if you prefer.
Configure the BGP session with Made4Flow, in our case we are going to use an iBGP, with the following configurations in the Juniper Router
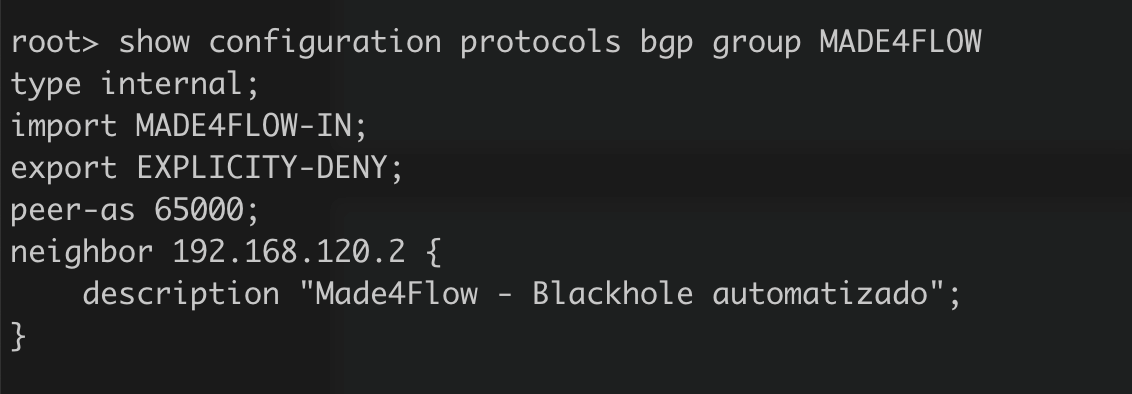
Commands used:
Configure
set policy-options policy-statement EXPLICITY-DENY then reject
edit protocols bgp group MADE4FLOW
set type internal
set import MADE4FLOW-IN
set export EXPLICITY-DENY
set peer-as 65000
set neighbor 192.168.120.2 description “Made4Flow – Automated Blackhole”
commit and-quit
Tip: remember to delete the blackhole routes manually, in our example: delete routing-options static route 200.200.200.1/32
- Configure Made4Flow to send via Actions
Within the Anti-DDoS Module, you can access the menu: Actions and Responses and configure the response to send the Blackhole with the correct BGP community:
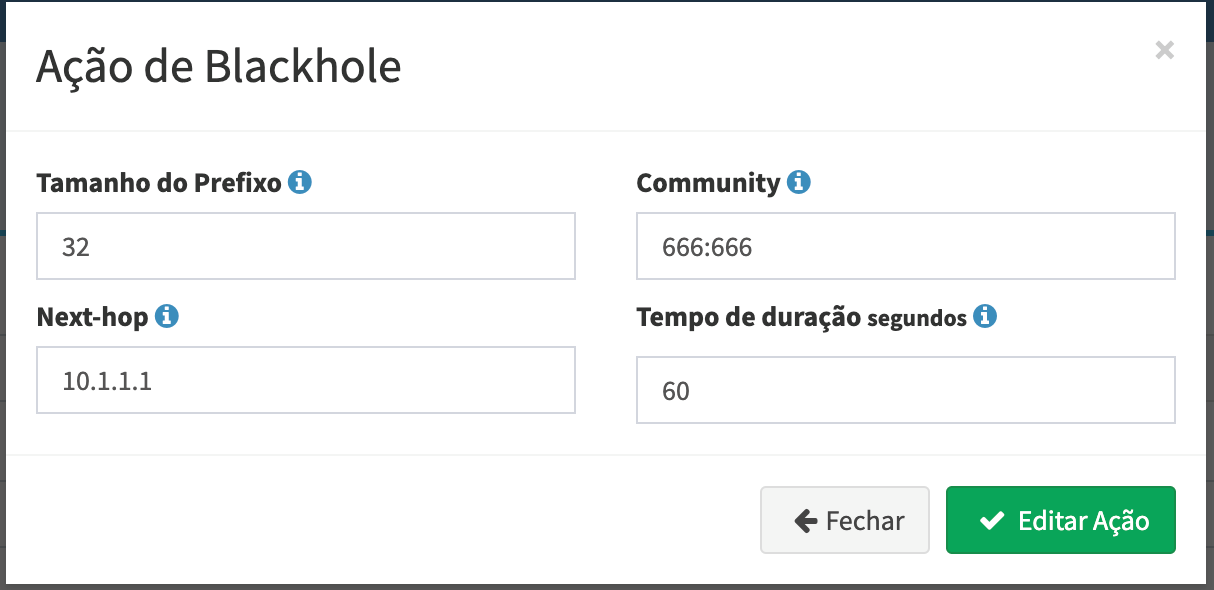
Configure the Router to Send to Carriers
To configure forwarding to carriers/upstreams, you must first configure a BGP community to be used in the Policy term with the carrier.
For this we need to set up a community

Comando: set policy-options community cm_blackhole_Made4Flow members 666:666
The next step is to configure your operator/upstream Policy, as in sending the blackhole, but now matching the community in the Term, as in our configuration:
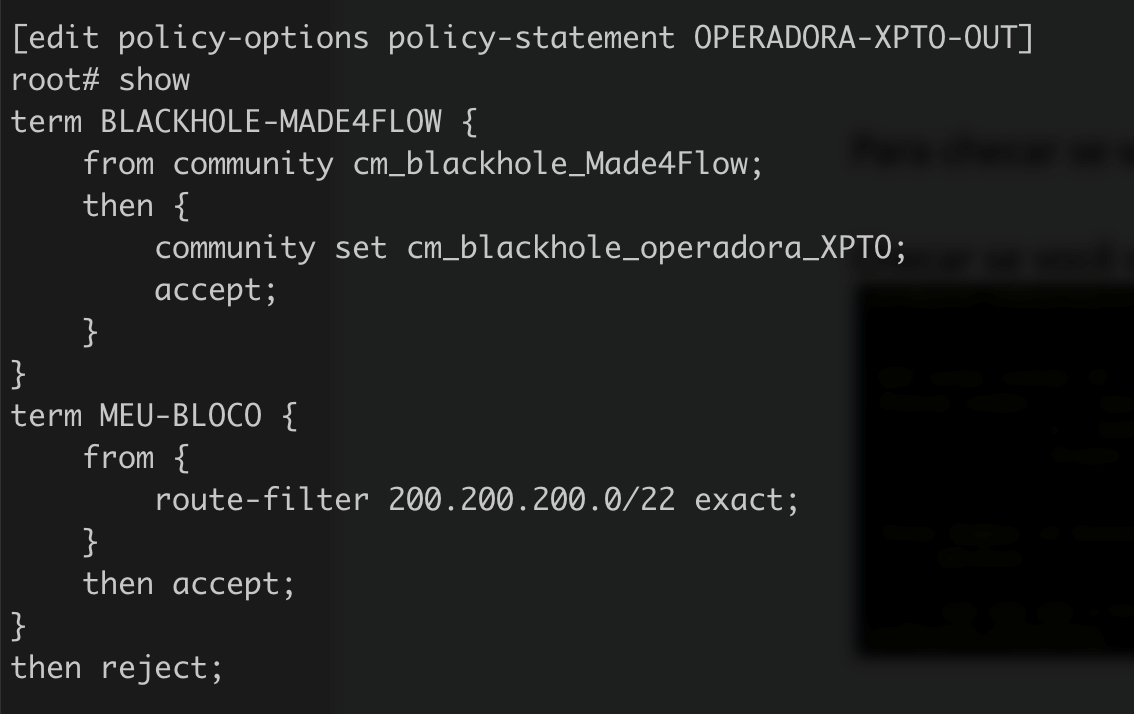
-l
Configure
edit policy-options policy-statement OPERADORA-XPTO-OUT
set term BLACKHOLE-MADE4FLOW from community cm_blackhole_Made4Flow
set term BLACKHOLE-MADE4FLOW then accept
set term BLACKHOLE-MADE4FLOW then community set cm_blackhole_operadora_XPTO
insert term BLACKHOLE-MADE4FLOW before term MEU-BLOCO
commit and-quit
To check if you are sending the announcement to the operator use the commands:
Check if you receive from Made4Flow
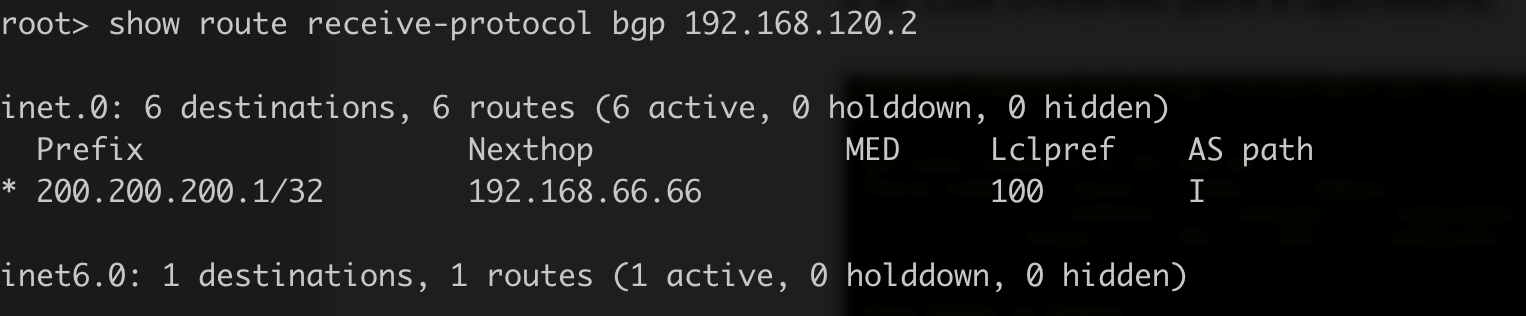
Comando: show route receive-protocol bgp 192.168.120.2
And if you are sending to the operator:
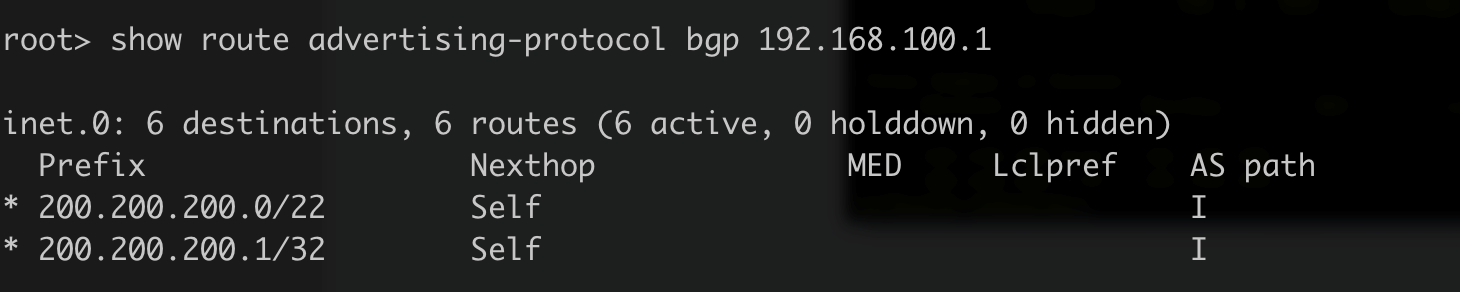
Comando: show route advertising-protocol bgp 192.168.100.1
Having made these settings, the automation of Made4Flow is ready. Upon receiving an attack, Made4Flow can now send this route to Blackhole.
To make it easier, we have the video below, showing in practice how to configure the Juniper Router with Blackhole.
If you have any questions, do not hesitate to contact us via WhatsApp, Social Media or E-mail.
See you next time!
