


Hello everyone!
In our last article we learned how to install and configure PFSense, to be used as the Gateway of your network, allowing it to act with several functionalities for the network. Today we will introduce you to creating a VPN with OpenVPN, so you can access your entire internal infrastructure from anywhere you need to.
What is a VPN?
Basically, VPN stands for Virtual Private Network, and it serves as a tunnel between two connection points.
When you set up a VPN between a computer at your home and a PFsense at your company, for example, the tunnel created allows your computer to act as if it were “inside” your company’s local network, granting access to servers and equipment, provided that the PFsense is reachable from your home computer.
Now that we understand what VPN is all about, let’s learn how to set it up using PFSense to establish the connection between your different networks.

Configuring the VPN
We’ll use PFSense’s built-in “Wizard” for this configuration. To do this, go to the VPN > OpenVPN. Then, click the Wizardstab:

When we access the Wizard, we will select the‘Type of Server‘, as‘Local User Access‘, and we can click on ‘ Next ‘.
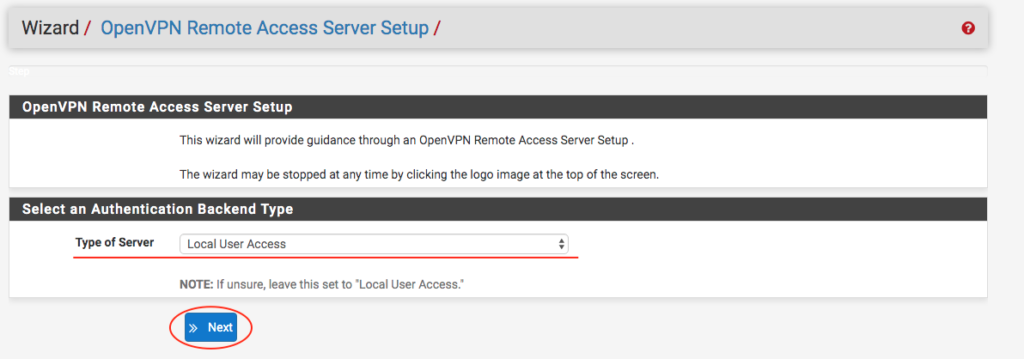
On the next screen you need to create a new Certificate Authority (Cerfificate Authority, or CA), by filling out the following fields:
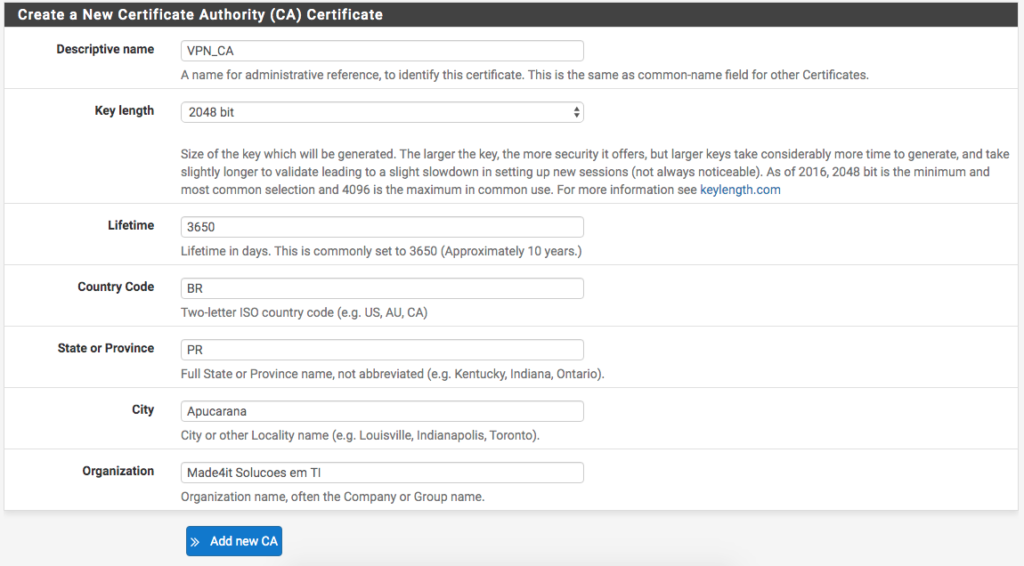
We will use the name: VPN_CA, indicating that this CA is used for the VPN. Next, we’ll specify the size of the encryption key that will be generated. A value of 2048 bits is sufficient.
The rest can be filled in according to your Country, State, City, and Organization (or company).
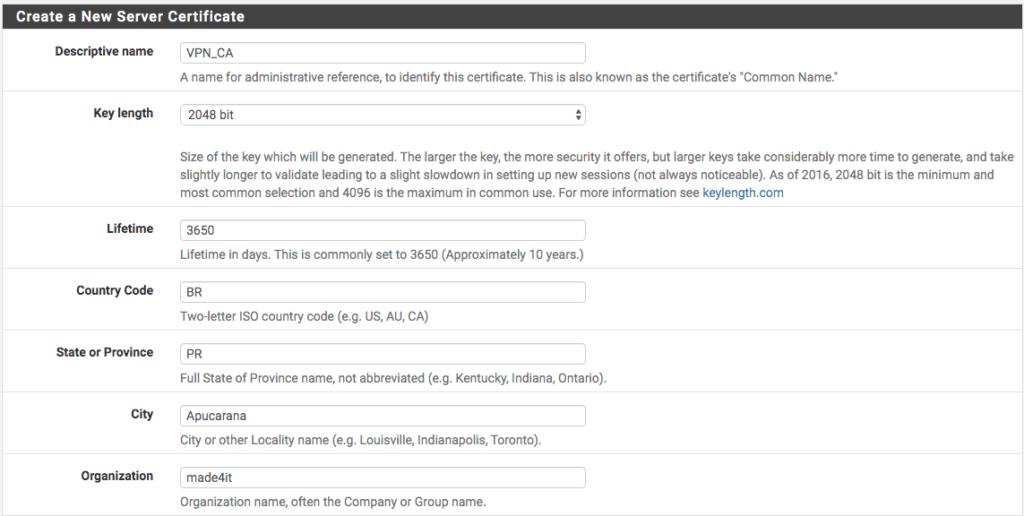
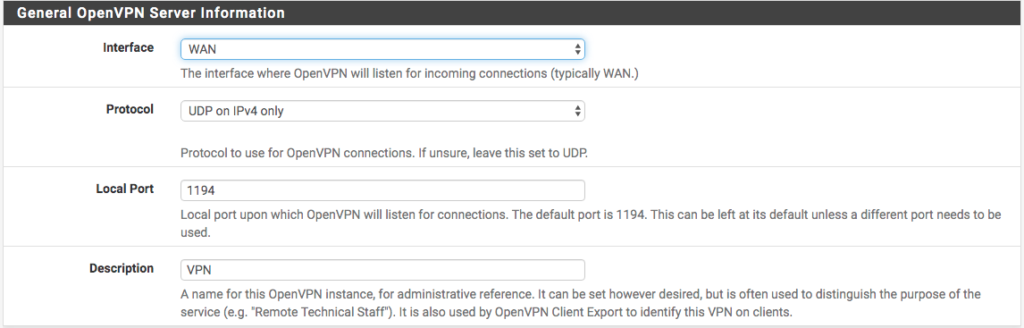
Now that we’ve finished setting up the server certificate, let’s configure the VPN access settings. To do this, we’ll select the access interface—in our case, the WAN. Then, we’ll fill in the rest of the information. I’ll be using the UDP only, on port 1194 and with the description ‘VPN‘.
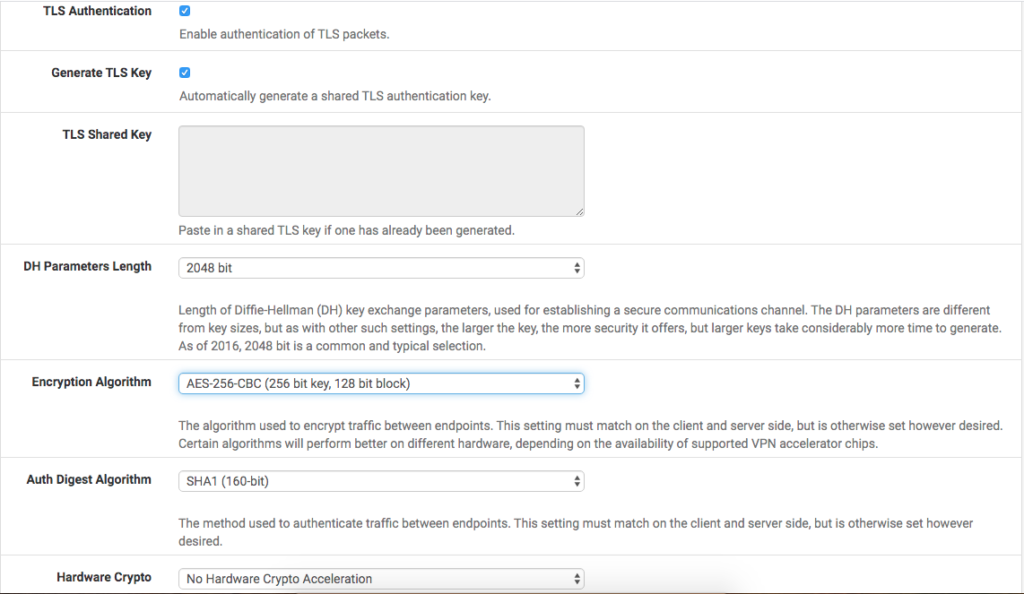
On the same screen, you’ll find the encryption settings. In these options, we’ll enable TLS authentication and the automatic creation of a shared TLS key for authentication.
We can set the ‘DH‘ to 2048, as is the default, and change the Encryption Algorithm to AES-256-CBC. Let’s choose the Authentication Algorithm ‘SHA1 (160-bit)’. It is important that this setting be the same on both the server (PFsense) and the client (your machine).
We have our configurations as follows:
In the next part we have the Tunnel settings.
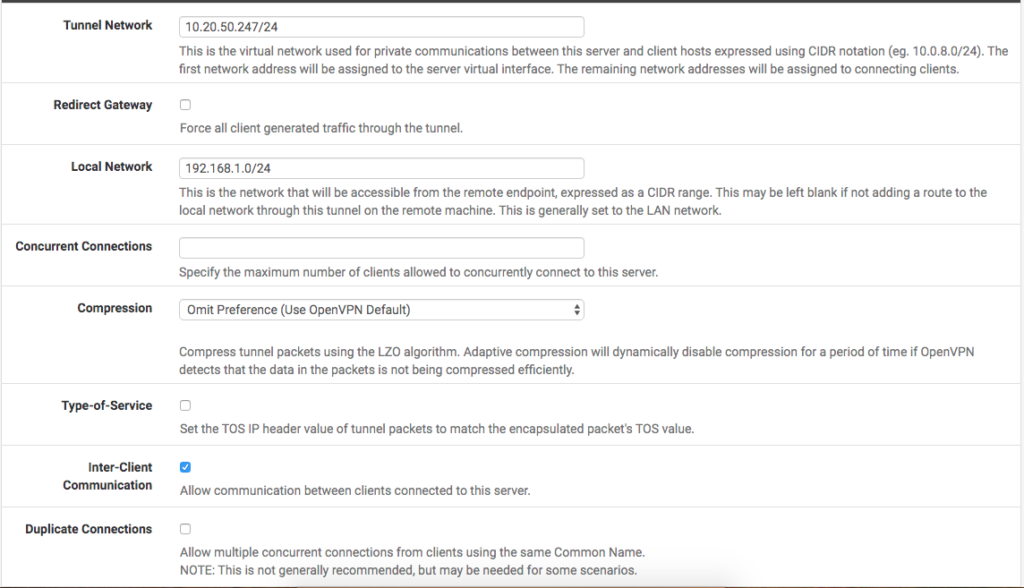
The first field refers to the IP pool that pfSense will use for its clients—that is, the IP addresses that PCs connecting to the VPN will be assigned within the virtual network. In our case, we selected a /24 block (256 IP addresses, with 254 hosts), which should be plenty. We chose the block 10.20.50.0/24.
Let’s fill in the “Local Network ‘ field‘ field to specify the LAN network we’re trying to access, so that pfSense can automatically create a route to that network. In our example, the network is 192.168.1.0/24.
We use the ‘Omit Preference‘ compression, and enable the ‘Inter-Client Communication‘ option if you want machines connected to the VPN to communicate with each other.
Currently, our settings are as follows:
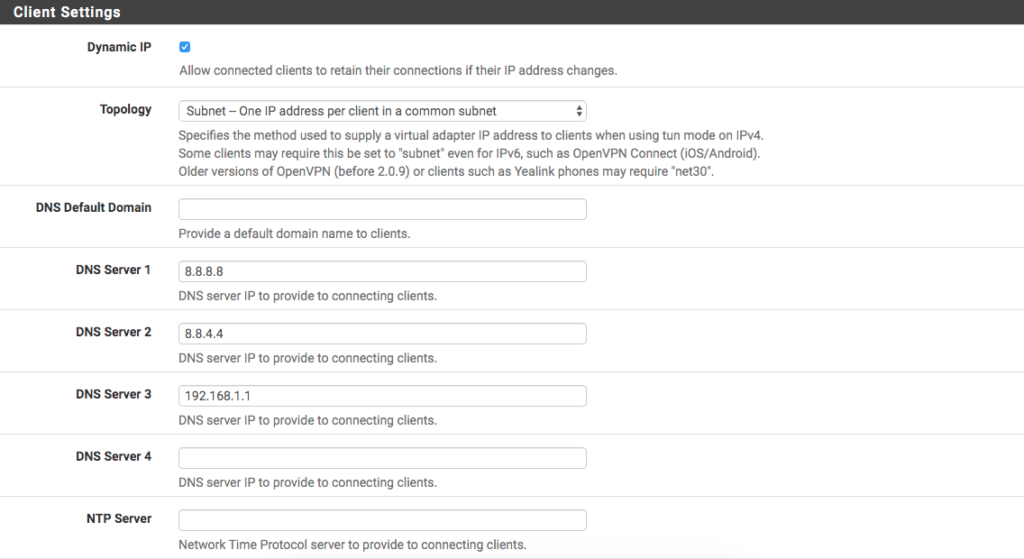
To complete the configuration, in the ‘Client Settings‘ field, you have the option to Dynamic IP enabledso that the connected IP addresses can change dynamically. In Topology, we select the Subnetoption to have a /24 subnet with IPs distributed within the block. If you want to isolate each client’s subnet, you can use the net30 option, which assigns each client a separate /30 subnet. Some older client versions require the “net30” option to be selected, while others require “Subnet.” It’s important to adapt your configuration to the client you’ll be using.
After that, you have the option to choose the DNS server for this VPN connection. We’ll leave the default Google’s from Google and PFSense itself as the DNS servers.
The final settings are as shown in the image:
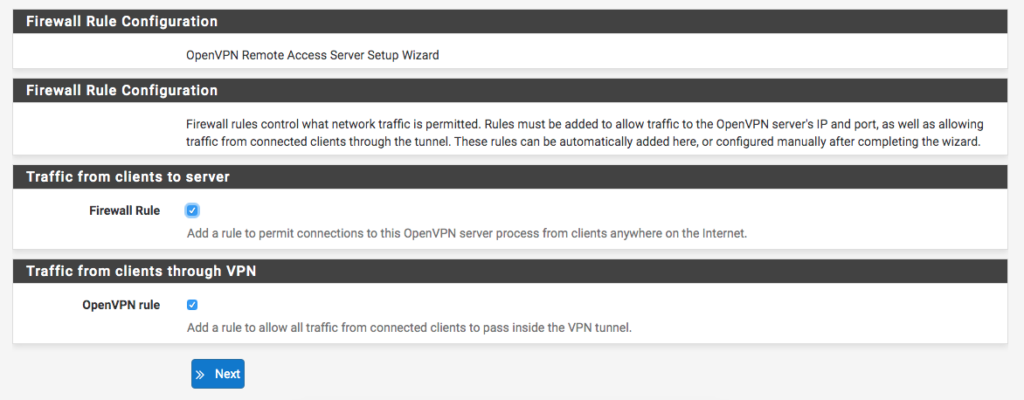
On the next screen, we have the option to set up a firewall rule to allow connections from anywhere on the VPN, which we can enable, since OpenVPN uses certificates for the connection; without the certificate (which must be provided directly to the person connecting) and a username/password, it is impossible to gain access to this network.
Just below that, the ‘OpenVPN rule‘ option, we can enableto allow all traffic from connected clients to pass through the VPN tunnel.
Finally, we finish the configuration and have the VPN ready.
Now we need to create the users that will have access to the tunnel.
Creating user with certificate for VPN
To create our users, go to System > User Manager and then go to ‘ + Add just below the panel with your PFSense users.

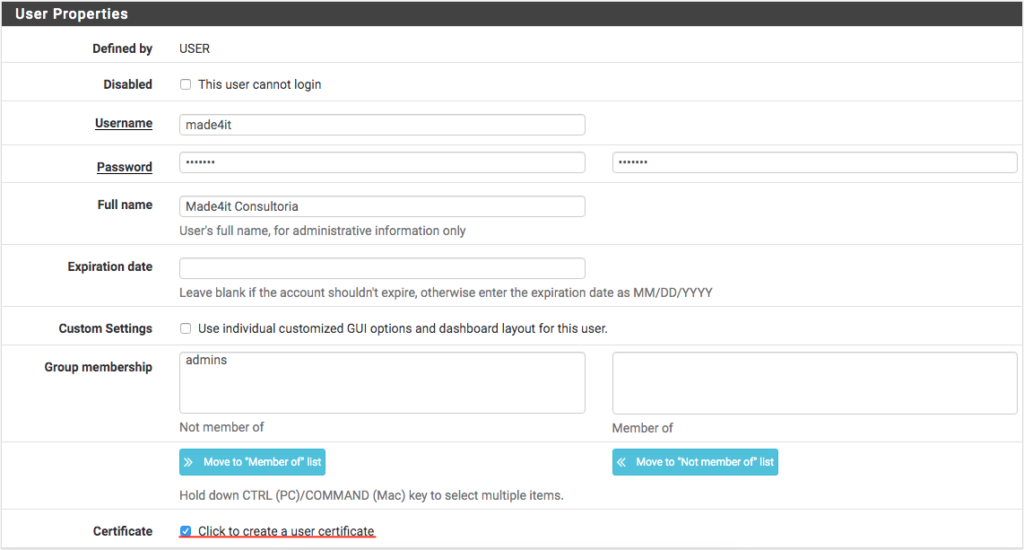
When creating a user, we add User, Password and fill in the rest with the user’s information. In this case, I’ll create a user named ‘made4it‘ that we’ll use to connect to the network.
Below the group selection, there is a ‘Certificate‘ button. You must click ‘check‘ to create user certificates.
Under the user settings, we’ll create the certificate for our user. To do this, we’ll create a description. We’ll use ‘made4it_cert‘ in our example. We select the CA created earlier and specify the same 2048 bits as we used when creating it.
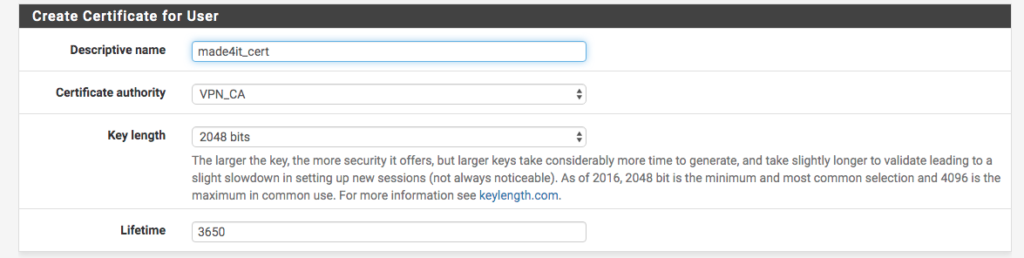
Once that’s done, we can save our user.
To access the VPN, we need to export our certificate using the ‘OpenVPN Client Export‘ package.
Client Export Installation
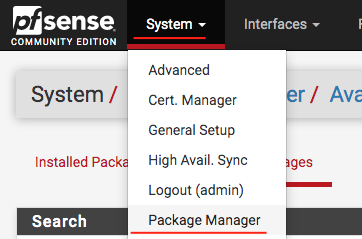
Let’s go to System > Package Manager > Available Packages and then, search for the package ‘ openvpn-client-export and give it a ‘ + Install on it, then wait for the installation to finish:
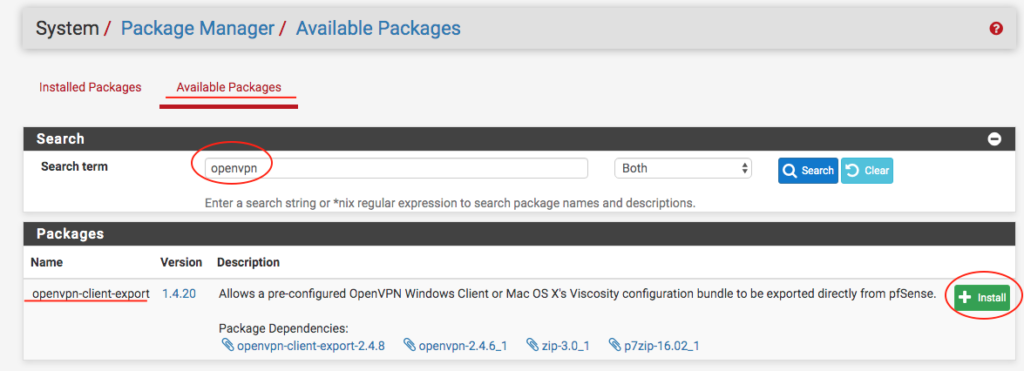
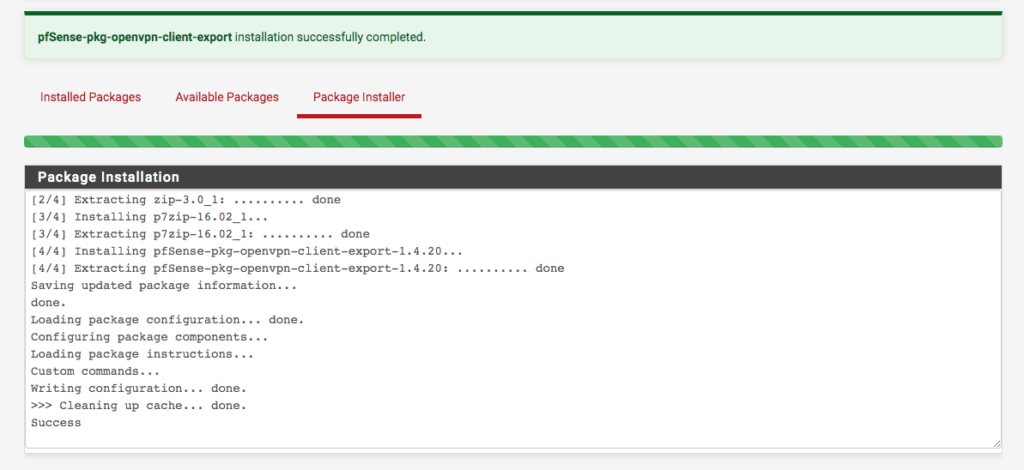
Once the installation is complete, simply go to VPN>OpenVPN>Client Export Utility, to begin exporting the certificate.
On this screen, we will leave the ‘Host Name Resolution‘ option as ‘Interface IP Address‘. In ‘
Verify Server CN
we can leave it at ‘
Automatic
‘.
The rest can be left unchecked, so we click on ‘ Save as Default to apply the changes.
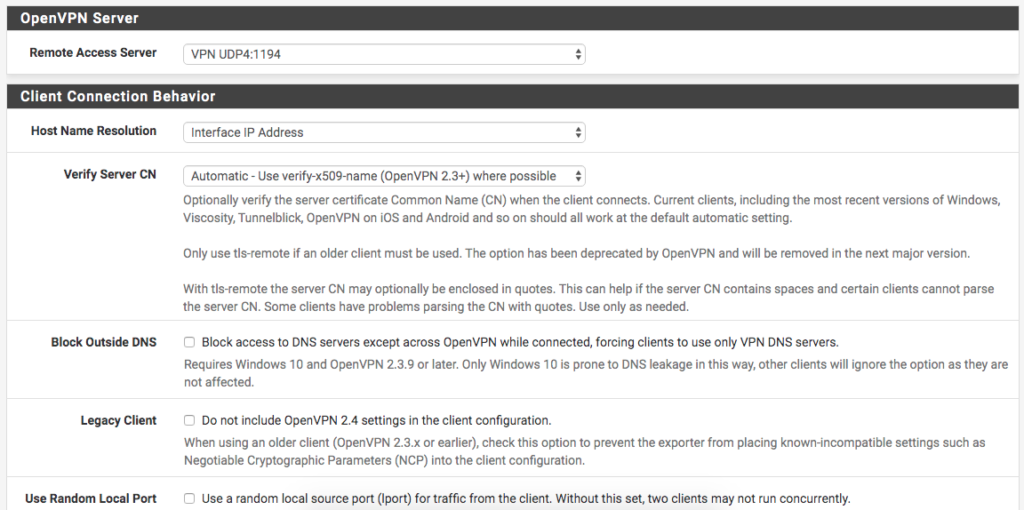
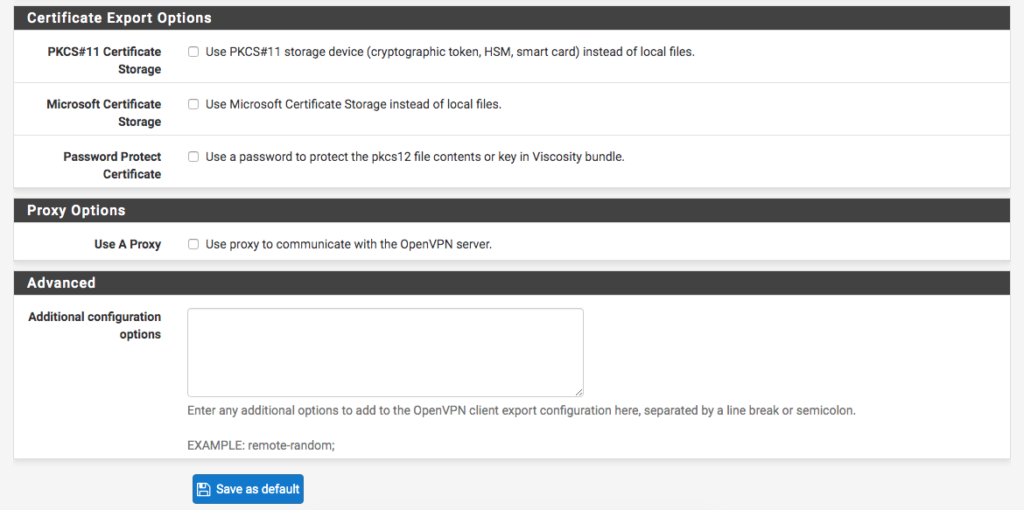
With the changes applied, we go to the bottom of the screen, to the user we created, and select the certificate/client that we will export.
In my specific case, I’ll download the ‘Most Clients‘ from ‘Inline Configurations‘, since I already have a client set up. If you’re going to use a Windows client, Viscosity (Windows or macOS), or another client, just choose the appropriate file.
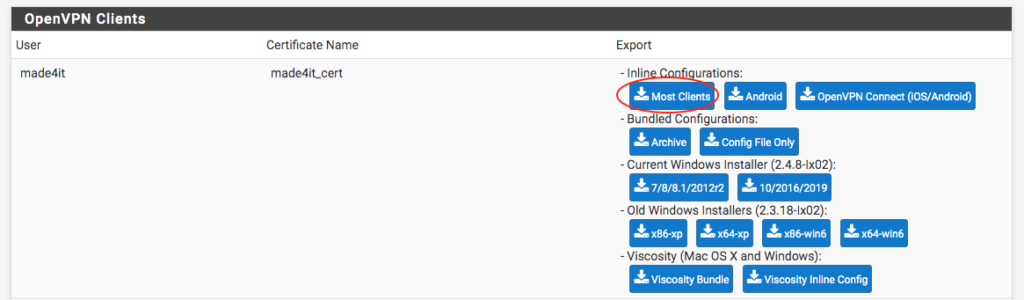
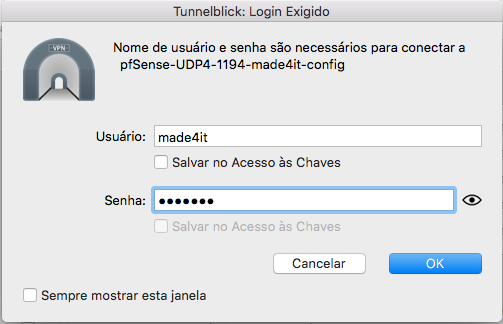
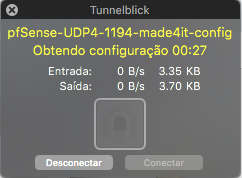
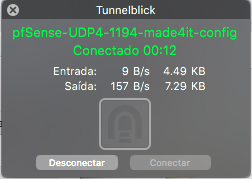
In my case, I’ll use the ‘Tunnelblick‘ on macOSto connect to the VPN. To connect, simply add the configuration files to your client; then, when you connect, you’ll be prompted for the VPN username and password, which will be for the user created earlier—in our case, the user ‘made4it‘:
Setting up VPN in Windows
To connect to our VPN, which is already configured on Windows, we need a client. We can install the OpenVPN client using the files provided by PFsense itself.
To do this, go to VPN > OpenVPN > Client Export, and download the most appropriate file. In this case, since I’ll be using the OpenVPN client, we can select the version under Current Windows Installer (for Windows 7/8 or Windows 10).
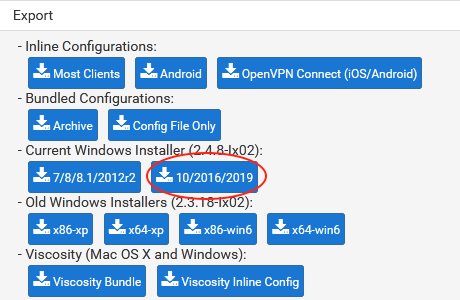
Once the file is downloaded, we can run it and proceed with the normal installation. The File we downloaded will start the OpenVPN configuration and install our VPN connection directly, with no further configuration required.
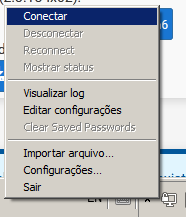
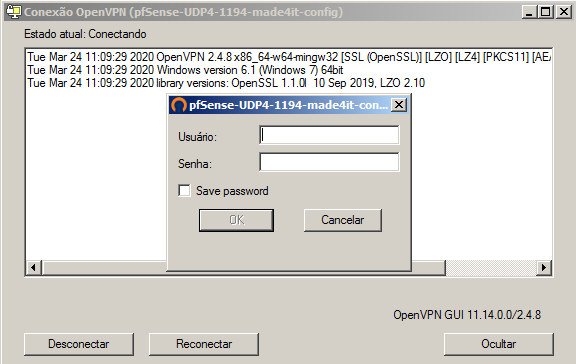
When the installers are finished, we can open OpenVPN by clicking on the shortcut created on the desktop, then right-click on the icon in the Toolbar (Next to the Clock), and finally click Connect and provide the user/password data created in PFSense.

So, that’s it, folks. This was our guide to setting up OpenVPN using pfSense and configuring a connection to it using the OpenVPN Client, with the files provided by pfSense itself.
If you need help or support with pfSense maintenance, please contact us —we’re here to help!
Thanks, and see you next time!
