




Hello,
. Today we’re going to show you how easy it is to configure your Mikrotik router to export NetFlow.
Here is the information about our server that will receive the NetFlow data:
Source IP (Src-address): 192.168.210.49
NetFlow Server: 192.168.210.47
NetFlow Port: 2055
NetFlow Version: 9
The first step in configuring Mikrotik is to access it via Winbox or, if you prefer, via the CLI. In this first example, we’ll demonstrate the process using Winbox:
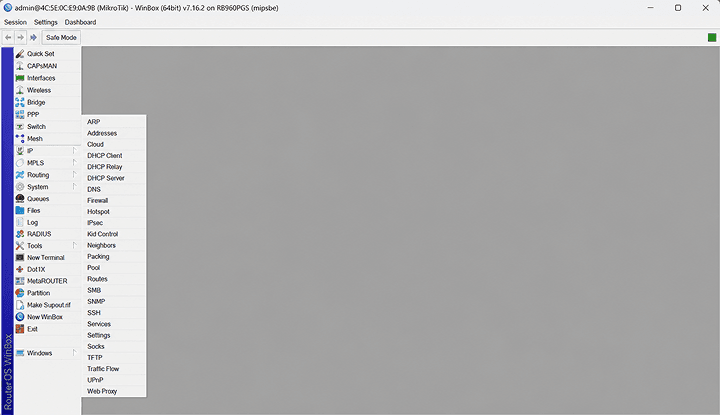
. Go to the menu: IP -> Traffic Flow
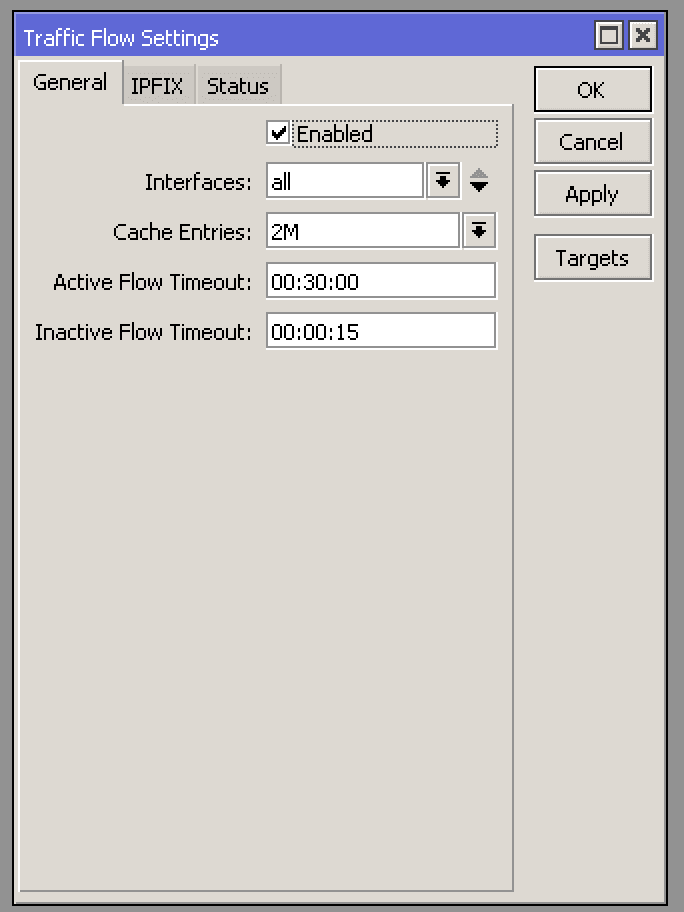
In the Traffic Flow menu, you need to configure “
.” Check the “Enabled” option.
Configure which interface(s) you will use to export NetFlow.
Cache Entries: Values typically range from 1M to 4M (depending on your router’s memory)
Once you’ve configured these options, NetFlow is enabled on your router, but you still need to configure the Targets to export data to your NetFlow server.
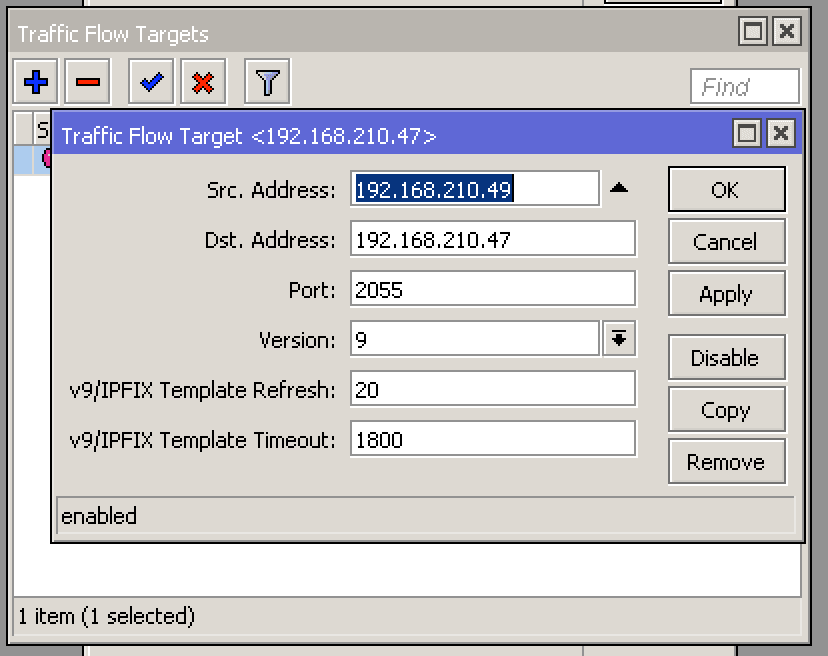
The next step is to configure the Targets, which are the server(s) that will receive the NetFlow data.
Click on the Targets Option and then on Add
Set the options as configured in your Netflow Server
Source Address (Source IP): 192.168.210.49
Destination Address (NetFlow Server IP): 192.168.210.47
Port: 2055
Version: 9
With these settings, your router will already be exporting data. If you want to check, you can go to the Menu: IP -> Traffic Flow, select the Status option, and verify whether the flows are completed or active.
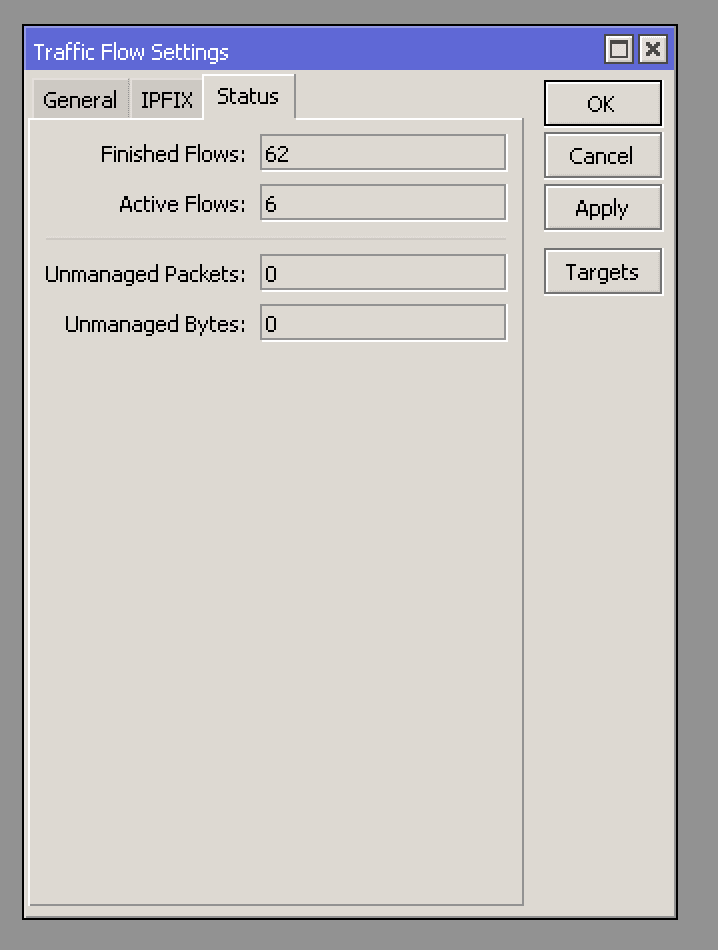
With these settings, your router will already be exporting NetFlow data.
If you want to configure it via the CLI (command line), here are the commands to use:
/ip traffic-flow
 set cache-entries=2M enabled=yes
/ip traffic-flow target
 add dst-address=192.168.210.47 src-address=192.168.210.49
Check out the video on configuring NetFlow in RouterOS
For more information access Mikrotik’s Documentation at: https://wiki.mikrotik.com/wiki/Manual:IP/Traffic_Flow
Sign up for our newsletter and get this and many other social media tips.
Big hugs, and see you next time.
